Blog

  • Pool Pumps Explained: Sizing, Running Costs and Energy Efficiency

    Pool Pumps Explained: Sizing, Running Costs and Energy Efficiency

    If your pool pump is the single biggest power user in the house, you are not imagining it. The pump is what keeps a pool clean and safe to swim in, so how you size it and how you run it makes a real difference to both water clarity and your electricity bill. The good news is that getting it right is mostly about matching the pump to your pool and running it smartly, not chasing the most powerful unit on the shelf.

    What the pump actually does

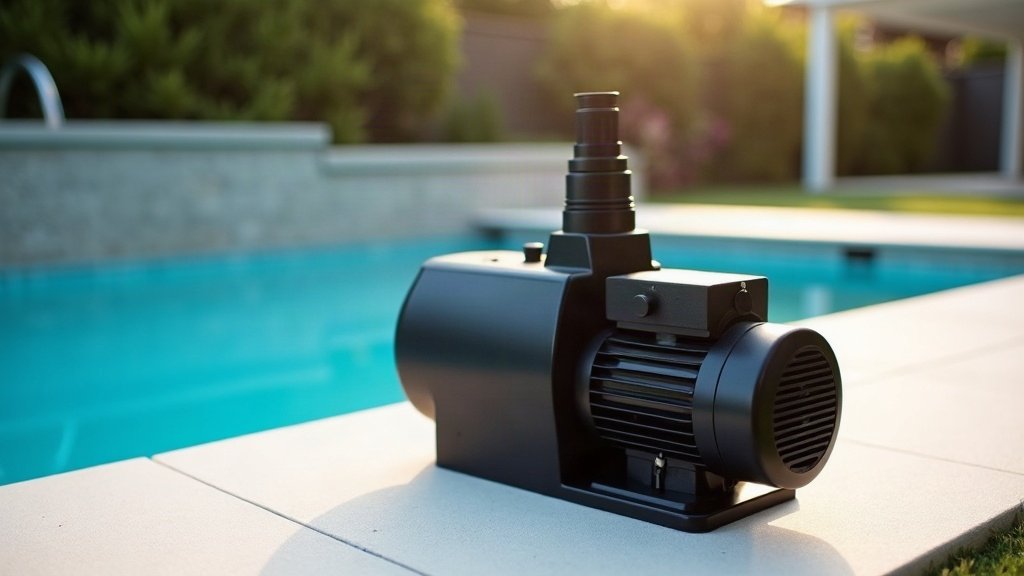
    A pool pump is the heart of the filtration circuit. It pulls water from the skimmer and the main drain, pushes it through the filter to strip out dirt and debris, sends it past the chlorinator or dosing gear, and returns clean water to the pool. Nothing else in the system works without that flow. If the pump is undersized or clogged, the filter can’t do its job and the water goes cloudy or green. If it is wildly oversized, you are just burning power, and you can even push water through the filter faster than it can properly clean.

    Single-speed versus variable-speed pumps

    There are two broad types you will come across:

    • Single-speed pumps: they run flat out whenever they are switched on, at one fixed speed. Cheaper to buy and simple, but they draw the same power whether you need full flow or not.
    • Variable-speed pumps: you can dial the speed up or down to suit the task, running slow and quiet for everyday filtering and faster only when you are vacuuming or backwashing.

    Most of a pool’s daily filtering doesn’t need full flow. That is the whole case for a variable-speed pump, and it is why they have become the default recommendation for new installs.

    Why variable-speed usually costs less to run

    The savings come down to how pumps use energy. Running a pump slower uses a good deal less power than running it flat out, so a variable-speed unit ticking over gently for most of the day draws far less than a single-speed pump hammering away at full noise. Across a whole filtering season that difference adds up. I won’t put a dollar figure on it, because it depends on your pool, your tariff and your hours, but the pattern is consistent: slower and longer beats fast and short for everyday filtering.

    Matching the pump to your pool

    The goal is turnover, meaning you filter roughly the whole pool volume over a set period so the water stays clean. A bigger pool, or one with plenty of swimmers and leaf litter, needs more turnover than a small, sheltered plunge pool. Rather than guessing, work from your actual pool volume and the filter you already have, and let a pool shop or installer match a pump to it. Bigger is not better here. An oversized pump costs more to buy, more to run, and can strain an undersized filter. A right-sized pump quietly does the job for less.

    Running times and off-peak

    You don’t have to run a pool pump around the clock. The aim is enough total turnover across the day, and you have some freedom in when that happens. Two habits help:

    • Split the run: a couple of shorter cycles, timed around when the pool actually gets used, often keep the water clearer than one long block.
    • Lean on off-peak: if you are on a time-of-use tariff, shifting filtering to cheaper off-peak hours trims the cost without cutting the turnover.

    Warmer months and heavy use call for more running time. Through winter, when the pool is barely touched, you can usually wind it right back. A timer, or a variable-speed pump’s built-in schedule, makes this close to set-and-forget.

    Repair or replace an ageing pump

    Pumps don’t last forever. A screeching motor, a pump that keeps losing prime, leaking seals, or a unit that trips the power are all signs something is on the way out. A worn seal or a blocked impeller is often a straightforward fix. But if you are nursing an old single-speed pump through repair after repair, swapping it for a modern variable-speed unit often pays for itself in running-cost savings before long. When you do replace it, remember one hard rule: the electrical connection of the pump is a licensed electrician’s job, not a DIY exercise for any hard-wired unit. And because pool areas carry their own safety and fencing requirements that vary by state, check your local requirements rather than assuming.

    Get the sizing right, run it on a sensible schedule, and a pool pump becomes the quiet, efficient workhorse it is meant to be.

  • Sump and Stormwater Pumps: Keeping Water Out of Your Home

    Sump and Stormwater Pumps: Keeping Water Out of Your Home

    Every time a decent storm rolls through, the water pools against the back slab and starts creeping toward the door. You bail it, you sweep it out, and the next downpour it is right back. That is the exact job a sump or stormwater pump is built for: shifting water that has nowhere else to go, before it gets inside. Here is how they work, how to tell a pump problem from a plain drainage problem, and who should be doing the connecting.

    What a sump or stormwater pump actually does

    A sump pump sits in a pit at the lowest point of a space that keeps flooding: a garage, a laundry, a shed floor or a boggy yard corner. Water drains into that pit, the pump senses it, and it lifts the water up and out to somewhere it can drain away safely. A stormwater pump does the same job on a bigger scale, clearing the runoff a heavy storm dumps faster than your normal drains can carry it off. Both are usually submersible units that sit down in the water rather than perched above it, and our submersible vs surface pumps guide covers that style versus a surface pump. Worth saying too: not every drop has to be pumped to waste, the clean roof runoff is often worth catching in a tank, which our rainwater harvesting guide covers, but a sump is about the water that has already pooled where you do not want it.

    The pit, the float switch and how it runs itself

    The clever part of a sump setup is that it looks after itself. You are not meant to stand there flicking it on. Three bits do the work.

    • The pit: a lined hole at the low point that gathers the water and gives the pump a reservoir to draw from, so it is not chasing a thin film across the floor.
    • The float switch: a floating trigger that rises with the water and kicks the pump on at a set level, then drops and shuts it off once the pit is drained, so it only runs when there is actually water to move.
    • The discharge line: the pipe that carries the water up and away to a legal discharge point, kept clear and running downhill so nothing flows back into the pit.

    Get those three right and the system quietly does its thing through a wet week without you thinking about it.

    Pump problem or drainage problem? Work out which first

    Before you spend a cent on a pump, be honest about why the water is turning up. A pump treats the symptom, but sometimes the water should never have pooled there at all. Have a look at the lie of the land after rain. If the ground slopes back toward the house, or a paved area sheds to one low spot, the real fix might be regrading, a spoon drain or a strip drain to carry water away before it ever collects. A pump earns its place where water genuinely has nowhere else to go, a below-grade garage or a natural low point, not as a patch over drainage that could be sorted properly. Money spent getting the fall right often saves you running a pump for the life of the house.

    When a blocked stormwater line is the real culprit

    Here is the one that catches people out. The pit keeps filling, the pump keeps straining, and everyone blames the pump, when the actual trouble is downstream. A stormwater line choked with tree roots, silt or a collapsed section cannot take the water away, so it backs up and floods the very spot you are trying to keep dry. If a pump that always coped suddenly cannot keep up, or water is surfacing at pits and gullies it never used to, suspect the line before you condemn the pump. Clearing or repairing that pipe often fixes the flooding outright. One important note: where stormwater is legally allowed to discharge, whether to the street, a legal point of discharge or the kerb, varies by council, so check your local requirements rather than just running a pipe to wherever is handy.

    Backup for the storm that really matters

    The cruel irony of a stormwater pump is that the storm big enough to need it is often the one that knocks the power out. A mains pump with no electricity is just a lump of plastic in a full pit. If flooding into the house is a genuine risk, it is worth a backup: a battery-backed pump that carries on when the power drops, or a second pump plumbed in so one can take over if the other fails. On a property that floods badly it is cheap insurance against the worst night of the year.

    Who installs and connects what

    This is where you draw a firm line. Dropping a portable pump into a pit and running a hose for a one-off is one thing. A permanent sump or stormwater system is another, and parts of it are not DIY.

    • The electrical side: connecting a pump to power, or putting a proper outdoor point where one is needed, is work for a licensed electrician on an RCD-protected circuit, not something to wire up yourself around water.
    • The pit and discharge: cutting a sump into a habitable or below-ground floor, and where the water is legally allowed to go, is not straightforward, and discharge points can be regulated by your council, so it pays to get it designed and signed off properly.

    Sort out why the water is really there, get the pump matched to the job and the drainage done right, and leave the wiring and the fixed discharge to the licensed trades. Do that and the next big storm becomes a non-event instead of a night bailing. For how this sits alongside the rest of your outdoor water setup, our guide to water in the Australian garden ties it all together.

  • Water-Wise and Drought-Tolerant Landscaping: A Practical Australian Guide

    Water-Wise and Drought-Tolerant Landscaping: A Practical Australian Guide

    A water-wise garden is not a yard full of gravel and a lonely cactus. It is a garden designed so the water you put on stays where the roots can use it, planted with things that do not gasp the moment a heatwave rolls through. Get that right and you have a green, living garden that shrugs off a dry Australian summer and costs far less at the tap. Here is how it is done, biggest wins first.

    What “water-wise” really means

    Being water-wise is about matching the garden to your climate and soil instead of fighting both. It is a design approach, not a plant list. Three levers do most of the heavy lifting: the soil you plant into, the way you group plants, and the mulch on top. Sort those out and even thirsty-looking beds get by on a fraction of the water. Skip them and no amount of clever watering will save you. For how this fits with pumps, ponds and the rest of your outdoor water use, read our guide to water in the Australian garden.

    Group plants by how thirsty they are

    The single smartest move in a water-wise garden is hydrozoning: putting plants with similar water needs together so you can water each zone to suit it, rather than soaking everything to keep the thirstiest plant alive. Think of it as three loose bands.

    • High-water zone: the veggie patch, pots and any lush feature planting, kept close to the house and to a tap so it is easy to tend.
    • Medium-water zone: the everyday shrubs and perennials that want a drink now and then but cope between waterings once established.
    • Low-water zone: the tough natives, succulents and hardy groundcovers out the back or along the verge that basically look after themselves.

    Once the beds are zoned, your watering makes sense: you are not drowning the survivors to rescue the divas.

    Feed the soil before you plant a thing

    This is the cheapest water saving there is, and the step most people rush. Sandy soil drains so fast the water is gone before the roots get a look in. Heavy clay sheds it off the top. The fix for both is the same: dig in plenty of compost so the soil holds moisture like a sponge and lets roots run deep. Then keep a good layer of mulch over every bit of bare dirt, because mulch does a lot of quiet work.

    • Cuts evaporation: it shades the soil so the sun cannot bake the moisture straight out of it.
    • Smothers weeds: fewer weeds means less competition for the water you do apply.
    • Keeps roots cool: a mulched bed holds a steadier temperature through a scorcher.

    Coarse bark, sugar cane, pea straw or leaf litter all work. Keep it a few fingers thick, top it up as it breaks down, and pull it back a little from plant stems so they do not stay wet and rot.

    Choose plants that want to be here

    Drought-tolerant does not mean drab. The range of plants that thrive on little water in Australian gardens is huge, from silver-leaved natives and grevilleas to succulents, ornamental grasses and Mediterranean herbs like rosemary and lavender. The trick is to pick for your spot and let them settle in. Even the toughest plant needs regular water through its first season or two while the roots get established. After that, most coast on rainfall plus the occasional deep soak.

    What suits you depends heavily on your local climate zone, so treat any plant list as a starting point. Before you fall for something, check with your council or a local nursery, both for what grows well in your area and because some vigorous plants are listed as weeds in certain regions. When in doubt, lean on locally native species: they evolved for your rainfall and feed the local birds and insects into the bargain.

    Water less often, but water properly

    How you water matters as much as how much. A daily light sprinkle trains roots to sit near the surface where they dry out fast. A longer, less frequent soak pulls them deep where the soil stays damp, so those plants ride out dry spells far better. A few habits make the difference.

    • Water early or late: watering in the cool of morning or evening means far less is lost to evaporation than a midday blast.
    • Aim at the roots: drip lines and soaker hose put water at the base of the plant instead of into the air, and pair beautifully with hydrozoning. Our garden irrigation guide walks through the options.
    • Use what falls for free: plumbing a tank into your beds means you are watering off the roof, not the mains, which our rainwater harvesting guide covers end to end.

    One more thing worth saying plainly: water restrictions and allowed watering days change by council and season, so check your local restrictions before you set a timer.

    Rethink the lawn

    A big thirsty lawn is usually the hungriest thing in the whole garden. You do not have to tear it all out, but ask how much you actually use. Shrink it to the patch the kids or the dog genuinely need, and hand the rest to mulched beds, hardy groundcovers or a gravel area for sitting. Where you keep turf, a warm-season grass suited to your region handles heat and dry far better than a soft cool-season lawn. Groundcovers in particular earn their keep: they knit across bare soil, keep it shaded and cool, and ask for almost nothing once established.

    None of this is hard, and you do not need to do it in one weekend. Start with the soil and the mulch, group your plants sensibly, choose things that suit your patch, and water them deeply but less often. Do that and the garden looks after itself through the hottest months, keeps the water bill sensible, and still feels like a proper garden rather than a car park.

  • Koi and Fish Pond Basics: Keeping Fish Healthy in an Australian Backyard Pond

    Koi and Fish Pond Basics: Keeping Fish Healthy in an Australian Backyard Pond

    Ask most people why the fish in their backyard pond died and they will blame a disease. Nine times out of ten it was not a bug at all. It was the water. Get the water right and healthy fish largely look after themselves, so that is where a beginner should put nearly all their attention.

    Here is what actually keeps koi and goldfish alive and well in an Australian backyard: enough water, enough oxygen, a filter that has had time to mature, sensible feeding, and a bit of protection from summer heat and hungry birds. Work through those in order and you will dodge the mistakes that catch nearly everyone starting out.

    Give them more water than you think they need

    Fish are far more forgiving in a big body of water than a small one, because a larger volume dilutes waste and holds a steadier temperature. A tiny ornamental pond heats up fast on a hot day and crashes cold on a still night, and those swings stress fish badly.

    As a rough guide rather than a hard rule, keep your stocking light. Beginners almost always want too many fish too soon, and an overstocked pond is the most common reason water goes bad. Koi in particular grow big and live for decades, so a handful of little ones today can become a serious load in a couple of years. Depth helps too: a deeper section gives fish somewhere cooler in a heatwave and steadier through winter. If you are still planning, our step-by-step guide to building a garden pond covers sizing and depth before you dig.

    Oxygen: the thing beginners forget

    Fish breathe dissolved oxygen, and warm water holds a lot less of it than cool water, which is why gasping at the surface on a hot, still morning is such a common panic. The fix is movement. Anything that breaks the surface, a small fountain, a waterfall, or an air pump with an airstone, pulls oxygen into the water.

    A few things worth knowing about aeration:

    • Run it through the night in summer: plants and algae consume oxygen after dark, so the lowest oxygen of the day is usually just before dawn.
    • Surface agitation beats depth: gas exchange happens where water meets air, so a gentle ripple across the top does more than a jet firing into the deep.
    • Get the power done properly: any pump or aerator wired to a fixed outdoor power point must be connected by a licensed electrician. Plug-in and low-voltage solar kits are fine to set up yourself, but mains work is not a DIY job.

    The nitrogen cycle, in plain English

    This is the bit that quietly kills more fish than anything else. Fish produce ammonia through their waste and gills, and ammonia is toxic. In a healthy pond, colonies of beneficial bacteria living in your filter convert that ammonia into nitrite (still toxic) and then into nitrate (far less harmful, and taken up by plants).

    The catch is that a brand new pond has none of those bacteria yet. Fill a pond on Saturday and drop fish in on Sunday, and the ammonia has nowhere to go. Let a new pond run for several weeks so the filter can mature before you add stock, add fish slowly, and pick up a simple water test kit so you are reading the water rather than guessing. The filter is the engine room of the whole thing, so it is worth getting right. Our guide to pond filtration and UV clarifiers covers how to match one to your pond.

    Feed less, and never in the cold

    Overfeeding is the fast track to green, smelly water, because uneaten food rots and spikes ammonia. The old rule holds up: only give them what they will clean up in a couple of minutes, and once a day is plenty for most backyard ponds. Fish are cold-blooded too, so as the water cools through autumn their metabolism slows right down and they can barely digest. Once it is genuinely cold, ease off and then stop feeding over winter, or you are just leaving rotting food in a pond that can least handle it.

    Surviving an Australian summer

    Heat is the big seasonal risk. Hot water holds less oxygen, evaporates faster, and pushes fish to their limits. A few sensible moves take the sting out of it:

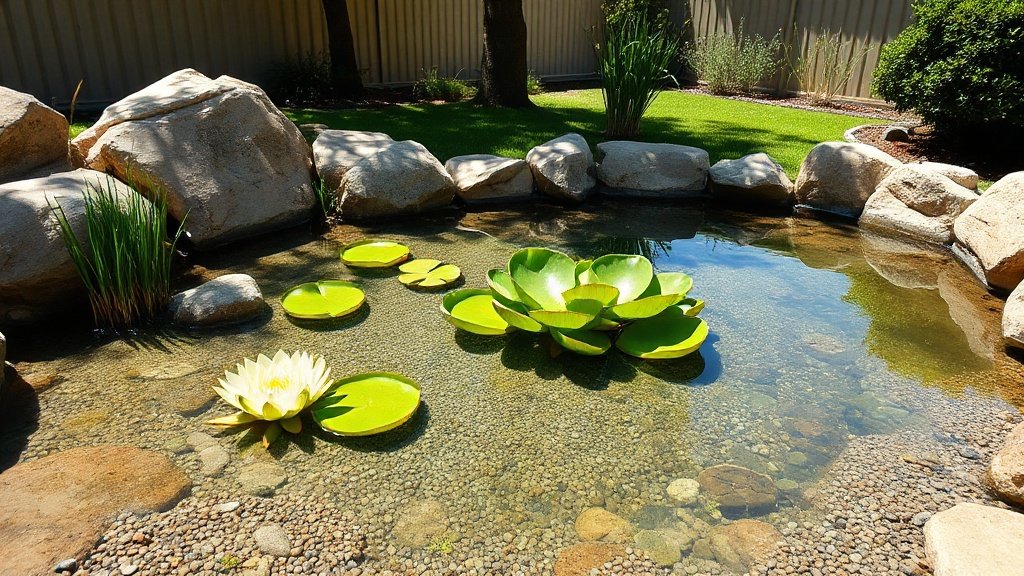
    • Throw some shade: floating plants like water lilies, or a shade sail over part of the pond, keep the water cooler and give fish somewhere to hide.
    • Top up gently: evaporation concentrates everything in the water, so keep the level up, and if you top up with town water let it stand or treat it for chlorine first.
    • Beat the birds: herons, kookaburras and the neighbour’s cat all fancy a feed, so a deeper zone, overhanging plants or netting gives fish a fighting chance.

    Reading the warning signs

    Fish tell you when something is off, usually well before it turns into a disaster. Watch for gasping at the surface, fins clamped tight against the body, flashing (rubbing against rocks), or fish going off their food and sitting listless on the bottom. The first response is nearly always the same: test the water and improve the oxygen. A partial water change and more aeration fixes a surprising number of problems.

    If fish stay sick after you have sorted the water, or you are seeing sores, ulcers or clear signs of parasites, get proper advice rather than throwing random medications at the pond. An aquatic vet or a specialist aquarium supplier can identify what you are dealing with and dose it correctly. Guessing at treatments does more harm than good.

    Plenty of water, steady oxygen, a mature filter, restrained feeding and a little seasonal common sense will carry a backyard pond full of healthy fish for years. For the bigger picture on pumps, ponds and water features around the garden, start with our complete guide to water in the Australian garden.

  • Fountains and Water Features for the Garden: Choosing, Powering and Placing Them

    Fountains and Water Features for the Garden: Choosing, Powering and Placing Them

    If you want the sound of moving water in the garden without digging a pond, a self-contained water feature is the easiest way in. It is a bowl, urn or stacked-stone piece with a small pump hidden inside, recirculating the same water over and over. No excavation, no fish to keep alive, and you can have it running the same afternoon you bring it home. The trick is matching the feature, the pump and the spot to each other so it looks right, sounds right and doesn’t turn into a chore.

    The main types, and which suits your yard

    Water features fall into a few honest categories, and picking the right family first saves you a lot of grief later.

    • Self-contained bowls and urns: everything sits in one vessel with a hidden reservoir. The simplest option and the best starting point for most people.
    • Spill and cascade features: water tips from one level to the next. More movement and more noise, so they suit a spot where you want the sound to carry.
    • Pondless waterfalls: water disappears into a hidden gravel-filled reservoir instead of an open pool. Safer around little kids and lower on maintenance, since there is no open body of water to keep clear.
    • Pond-fed features: a fountain or spillway plumbed into an existing pond. Lovely if you already have a pond, but now the feature and the pond share one system, so size the pump for both.

    If you are weighing whether the pump for one of these should sit in the water or beside it, our explainer on submersible versus surface pumps walks through where each one earns its keep.

    Getting the sound you actually want

    This is the part people get wrong. The sound is not about how much water you move, it is about how far the water falls and what it lands on. A short trickle into a full bowl gives you a soft, gentle babble. The same water dropping a bit further onto pebbles or a hard surface gives you a brighter, busier splash. So before you buy, picture where you will be sitting. A gentle burble is perfect right beside an outdoor lounge, but you will barely hear it from the back step. Want it to mask road noise from the front of the block? You need more drop and more splash, which usually means a taller spill feature, not a bigger pump on a low bowl.

    Mains power or solar: an honest comparison

    Both have their place, and the right pick comes down to where the feature lives.

    Solar fountain pumps run off a small panel and need no wiring at all, which makes them brilliant for a spot far from the house where running power would be a hassle. The catch is simple: they push water while the sun is on the panel and ease off when a cloud rolls over or the afternoon shadow creeps across. If you want a steady, all-day flow you can rely on, or you want it running of an evening, a solar pump on its own will frustrate you. Some come with a small battery to smooth that out, but keep your expectations sensible.

    Mains-powered pumps give you that constant, set-and-forget flow, and they will run after dark and on grey days. The trade is that they need an outdoor power point, and that is where you stop being a DIYer, which brings us to the safety bit.

    Powering it safely

    Any mains-powered feature has to run off a proper outdoor power point on an RCD-protected circuit, and installing that point is work for a licensed electrician. Water and mains electricity sitting a metre apart is exactly the situation the rules exist for, so do not run a lead out a window or daisy-chain power boards to reach the spot. Plug-in solar kits and genuine low-voltage setups are a different story and are fine to set up yourself, but the moment fixed mains wiring is involved, that is a sparky’s job, full stop.

    Placement and the top-up reality

    Two practical things decide whether you enjoy the feature or resent it. First, evaporation is real, especially through an Australian summer. A small feature in full sun can drop its level noticeably in a few hot days, and if the pump sucks air because the reservoir ran low, it can burn out. So site it where you will actually notice the level, and get in the habit of a quick top-up. Second, think about leaf litter and shade. Under a big deciduous tree you will be forever fishing leaves out, and shade cloth of a different kind, the natural sort, drops muck straight into the water.

    Keeping it clean and running

    Recirculating features are low fuss, but they are not no-fuss.

    • Keep the water up: check the level every few days in summer so the pump always has water to draw.
    • Rinse the pump inlet: a clogged inlet screen is the number one reason a fountain slows to a dribble. A quick rinse under the tap sorts it.
    • Stop it going green: keep the feature out of all-day direct sun where you can, and empty and wipe it out every so often rather than letting sludge build up.
    • Break the mosquito cycle: moving water rarely breeds mozzies, but a feature switched off for weeks over winter can. Either keep it ticking over or drain it down when it is not in use.

    Get those basics right and a water feature is one of the cheapest bits of atmosphere you can add to a backyard. If you are thinking about how it fits alongside pumps, ponds and the rest of your outdoor space, have a read of our guide to water in the Australian garden.

  • Pond Filtration and UV Clarifiers: How to Get Clear, Healthy Pond Water

    Pond Filtration and UV Clarifiers: How to Get Clear, Healthy Pond Water

    Answer first: green, cloudy pond water almost always comes down to filtration that isn’t keeping up with the muck and nutrients in the water. Get three things working together, mechanical filtration, biological filtration and, when algae is the culprit, a UV clarifier, and most backyard ponds clear up and stay that way. Here’s how the pieces fit, sized to your pond and the fish in it, without any guesswork about wattage or flow rates you don’t need.

    Why pond water turns green

    Green water is a bloom of single-celled algae, and it feeds on two things: sunlight and nutrients. The nutrients come from fish waste, uneaten food and leaves breaking down on the bottom. As that organic matter rots it releases ammonia, which is toxic to fish. Helpful bacteria convert the ammonia into nitrite, then into nitrate, which plants and algae then lap up. That chain is the nitrogen cycle, and it is the engine room of every healthy pond.

    So a green pond usually means one of two things: too many nutrients going in, or not enough biological filtration to process them. Balance that out and you starve the algae of what it lives on.

    Mechanical vs biological filtration

    These two do completely different jobs, and a good filter setup runs both.

    • Mechanical filtration: traps the physical gunk, leaves, fish waste and sludge, on foam pads, brushes or a fine screen. This is the part you rinse out regularly.
    • Biological filtration: gives those helpful bacteria somewhere to live. Porous media like bio-balls, ceramic rings or filter matting has a huge surface area, and the bacteria colonising it are what quietly turn toxic ammonia into far safer nitrate.

    Mechanical media you clean often. Biological media you leave well alone as much as you can, because scrubbing it hard kills off the colony you spent weeks growing. A gentle swirl in a bucket of pond water is plenty.

    What a UV clarifier does, and what it doesn’t

    A UV clarifier is a sealed tube with an ultraviolet globe inside. Pond water pumped past the globe cops a dose of UV light, which clumps the free-floating algae together so your mechanical filter can finally catch it. Run it for a week or two and pea-soup water usually turns clear.

    Here is the catch. A UV clarifier only deals with the green algae floating in the water. It does nothing for the stringy algae clinging to your rocks, and it is not a filter on its own: it only works with water flowing through it and a filter downstream to trap what it clumps together. It also won’t fix the underlying nutrient problem, so pair it with proper biological filtration rather than leaning on it alone. If you want to look at the buying options, a compact unit like a Pond One Cleartech UV steriliser suits a typical backyard pond, and it still needs a pump to push water through it. (As an Amazon Associate we earn from qualifying purchases.)

    Matching filter and pump to pond size and fish load

    The honest answer is that bigger is safer than smaller. A filter rated for a larger pond than yours will still cope on a hot day when the fish are active and the water is working hardest. Undersize it and you will be forever chasing green water.

    Two things drive the sizing:

    • Pond volume: roughly how many litres of water you are holding.
    • Fish load: a pond stocked with koi produces far more waste than a couple of goldfish, so it needs more filtration for the same volume.

    The pump is what ties it all together, because it has to move enough water through both the filter and the UV unit to actually turn the pond over. A reliable submersible unit such as a Platypus pond and fountain pump sits down in the pond and pushes the water up to the filter. Match the pump to the filter’s needs and the UV globe’s flow window, rather than grabbing the biggest one on the shelf.

    Flow, plumbing and placement basics

    Keep the plumbing short and simple. Every extra bend and metre of hose robs you of flow. Sit the filter slightly above the water line where you can, so it drains back cleanly, and keep the UV unit out of direct sun so the housing doesn’t cook in the afternoon.

    One thing that is not a DIY job: the power. Any pond pump or UV clarifier has to run off an outdoor power point on an RCD-protected circuit, and that connection is work for a licensed electrician. Water and electricity sitting next to each other is exactly where you don’t cut corners.

    Seasonal cleaning and keeping it running

    A pond filter is a living thing, so treat it like one.

    • Weekly in summer: rinse the mechanical pads and check the pump inlet isn’t blocked.
    • Every month or so: wipe over the UV globe housing, since a filmed-over sleeve blocks the light that does the work.
    • Once a year: UV globes lose their punch long before they stop glowing, so plan to swap the globe about yearly even if it still lights up.
    • Autumn: net the leaves off the surface before they sink and rot, which is the single best thing you can do to keep spring water clear.

    Get the filtration right, keep the flow steady and stay on top of the cleaning, and clear, healthy pond water stops being a battle. For the bigger picture on how ponds sit alongside pumps and the rest of the garden, have a read of our guide to water in the Australian garden, and if you are still planning the pond itself, start with how to build a garden pond.

  • Submersible vs Surface Pumps: Which One Does Your Job Need?

    Submersible vs Surface Pumps: Which One Does Your Job Need?

    The quickest way to choose between a submersible and a surface pump is to ask where the water is. A submersible pump sits down in the water — in a tank, pond, sump or bore — and pushes from below. A surface pump sits up on dry ground and draws water up to itself. Each suits different jobs, and the limiting factor for surface pumps is how far they can suck water upward. Here’s how to match the type to your task.

    The two broad pump families

    Almost every water pump falls into one of two camps based on where it lives. Submersible pumps are built to be fully underwater and they push water up and out. Surface pumps stay dry, sit beside or above the water source, and pull water up before pushing it on. That single difference — pushing from in the water versus pulling from above it — drives most of the practical trade-offs in noise, access, priming and what each is good at.

    Submersible pumps: where they shine

    Because they sit in the water, submersibles are excellent wherever the water is contained or below ground: emptying or pressurising tanks, circulating ponds, clearing water from sumps and pits, and drawing from bores where the water is well below the surface. Being underwater makes them quiet — the water muffles the motor — and they’re self-cooled and never need priming, since they’re always surrounded by the water they move. The trade-off is access: to inspect or service one you have to lift it out of the tank or pit.

    Surface and self-priming pumps: where they shine

    Surface pumps stay on dry land, which makes them easy to reach, check and maintain. They suit drawing from shallow sources — a tank where the water sits near or above the pump, a shallow well, a stream — and transferring water from place to place. Self-priming versions can clear air from their suction line and get themselves going, which is handy where the pump sits above the water. The catch is that they have to lift water up to themselves before they can push it on, and there’s a limit to how far up they can pull.

    Suction lift and priming — the limit people forget

    This is the single thing that catches people out. A surface pump can only pull water up so far before it simply can’t lift any more — that vertical distance is its suction lift, and physics caps it. The exact workable distance depends on the pump, the pipework and your conditions, so don’t treat any single figure as a universal rule. If your water source sits well below where the pump would go, a surface pump may struggle or refuse to prime, and a submersible — which pushes rather than pulls — is usually the better answer. When in doubt, check the suction lift against your actual setup before buying.

    Noise, access and maintenance differences

    Submersibles are quiet because the water absorbs the sound, but they’re out of sight and a little more effort to pull up for a look. Surface pumps are easy to inspect and service since they’re right there in the open, but they’re more audible — worth considering if the pump sits near a patio or bedroom window. Think about how often you’ll need to get at the pump, and how much noise you can live with, alongside the technical fit.

    Matching the type to the job

    Put it together by source: tanks can go either way depending on where the water sits; ponds and sumps lean submersible; bores with deep water almost always want a submersible; shallow draws and general water transfer suit a surface or self-priming pump. Get the family right first, then size the pump to the work.

    Two rules apply to both types. The electrical connection must be done by a licensed electrician on an outdoor, RCD-protected circuit — especially important with submersibles sitting in water. And any connection to mains or potable water, including backflow prevention, is licensed plumber’s work. Position and plumb the garden side yourself; bring in the trades for those connections.

    Choosing a pump type is one piece of the wider water picture — see how it fits with tanks, ponds and efficient watering in our guide to water in the Australian garden.

  • Irrigation for a Thriving Garden: Watering Beds, Lawns and New Trees Efficiently

    Irrigation for a Thriving Garden: Watering Beds, Lawns and New Trees Efficiently

    Efficient irrigation means getting the right amount of water to the right place with as little waste as possible — usually with a pump or pressure source feeding drip lines or sprays on a sensible schedule. The trick is matching the system to each zone, watering new plantings differently from established ones, and staying within your council’s water rules. As always, the pump’s electrical connection is a licensed electrician’s job and any mains or backflow work belongs to a licensed plumber.

    Why irrigation often needs its own pump or pressure source

    Drip lines and sprays need a reasonably steady pressure to work evenly. If you’re watering from a rainwater tank, gravity alone usually won’t cut it, and even on mains the pressure can sag once you open several zones. A pump or pressure source gives the system the consistent push it needs so the far end of a line gets as much water as the near end. Match the pump to the demands of your zones rather than guessing — too little and coverage suffers, too much and you waste water and stress the fittings.

    Drip vs spray and what each demands

    Drip irrigation delivers water slowly, right at the root zone, with very little lost to evaporation or wind — ideal for garden beds, hedges and individual plants. It runs at lower pressure but needs clean water and the occasional flush to stop emitters clogging. Spray and sprinkler systems cover broad areas like lawns quickly, but lose more to evaporation and drift, and want higher flow and pressure. Many gardens use both: drip in the beds, spray on the lawn, each on its own zone so you can water them differently.

    Matching output to watering zones

    Group plants with similar water needs into zones, and size each zone to what your pump and supply can comfortably deliver at once. Trying to run too many sprinklers off one line just starves them all. Splitting the garden into a few well-matched zones — run in sequence rather than all together — gives even, reliable watering and lets you tailor timing to each area.

    Watering newly planted trees and gardens for establishment

    New plantings are the thirstiest and least forgiving. A tree or shrub that hasn’t yet grown a wide root system relies entirely on the water near its base, so during establishment it needs consistent, deep watering — slow and thorough, encouraging roots to grow down rather than staying shallow. Mulch helps hold that moisture in. Consistent watering is critical while a tree establishes, and qualified arborists such as Waratah Professional Tree Care can advise on care for newly planted or established trees. Once a plant is established, you can usually taper watering back as its roots reach out and find their own moisture.

    Timers, controllers and water-wise scheduling

    A timer or controller takes the guesswork and the forgetting out of watering. Set zones to run in the early morning when evaporation is low and plants can take the water up through the day. Water deeply but less often to encourage strong roots, and adjust with the seasons — far less in cooler, wetter months. Smarter controllers can skip a cycle after rain or adjust to the weather, saving water without you lifting a finger.

    Water restrictions, allowed watering days and hours, and rules around certain water sources vary by council and can change. Check your local restrictions before setting a schedule, and build your timer around what’s currently permitted where you live.

    Who connects the pump and supply

    You can lay out drip lines, sprinklers and timers yourself — that’s the fun part. But two connections aren’t DIY. The pump’s electrical connection must be done by a licensed electrician on an outdoor, RCD-protected circuit. And anything that ties into the mains supply, or that needs backflow prevention to stop irrigation water flowing back into the drinking supply, is licensed plumber’s work. Plan for both trades where they apply and the rest of the system is yours to build.

    Irrigation is one thread in a connected water system — see how it fits with tanks, pumps and water-wise design in our guide to water in the Australian garden.

  • Pressure and Booster Pumps for the Home: Fixing Weak Water Pressure

    Pressure and Booster Pumps for the Home: Fixing Weak Water Pressure

    If your shower dribbles, the washing machine takes forever to fill, or two taps running at once kills the flow, a pressure or booster pump may be the answer — but not always. Sometimes low pressure has a simpler cause worth ruling out first. When a pump genuinely is the fix, the plumbing connection is a licensed plumber’s job and the electrical connection is a licensed electrician’s job. Here’s how to tell what you need.

    Why pressure might be low (and when a pump is the answer)

    Low water pressure has a few common culprits. You might be at the end of a long supply line, up a hill, or simply in an area with naturally low mains pressure. Sometimes it’s a partly closed valve, a blocked filter or aerator, or old galvanised pipes narrowed by corrosion — all worth checking before you spend on a pump, because they’re cheaper to fix.

    If the supply pressure itself is genuinely low — or you’re drawing from a rainwater tank that can’t provide household pressure on its own — that’s when a pressure or booster pump earns its place. It lifts the pressure to a comfortable, usable level throughout the house or garden.

    How a pressure or booster pump works (in plain terms)

    A booster pump does what the name says: it takes water coming in at a low pressure and boosts it to something more useful. Water enters the pump, an impeller driven by an electric motor adds energy, and the water leaves at higher pressure. Many systems pair the pump with a small pressure tank that smooths out delivery and stops the pump from constantly switching on and off for every little draw.

    Constant-pressure vs on/off systems

    There are two broad styles. A traditional on/off (pressure-switch) system runs the pump until pressure reaches a set point, then stops, and restarts when pressure drops — simple and reliable, though you may notice slight pressure swings. A constant-pressure system varies the pump’s speed to hold steady pressure no matter how many outlets are open, which feels smoother, especially when several taps run at once. Constant-pressure setups generally cost more; the simpler system is often plenty for a single household.

    Where the pump fits in the plumbing — and who connects it

    A booster pump is installed in line with your water supply — after the meter or tank, before the outlets you want boosted. Getting that connection right matters: it needs correct fittings, isolation valves so it can be serviced, and protection against running dry. Tying a pump into your household water supply is licensed plumbing work, and depending on the setup may involve backflow prevention to protect the town supply. This is a job for a licensed plumber, not a DIY plumbing project.

    Electrical supply: why this is a licensed electrician’s job

    A booster pump runs on mains electricity and usually lives outdoors or in a wet area like a laundry or pump shed. Wiring it in must be done by a licensed electrician, on an RCD-protected circuit suited to the pump. Water and unlicensed electrical work are a dangerous combination, and outdoor power simply isn’t a DIY connection in Australia. Plan for the electrician as part of the install, not an afterthought.

    What to look for when buying

    Without naming products, a few qualitative things help you choose well. Match the pump’s capability to your actual need — a small flat with one bathroom has very different demands to a large house running multiple showers at once. Look for dry-run protection so the pump shuts down rather than burns out if it loses water. Consider noise if it’s near living areas, and think about access for servicing. And get advice on sizing: an oversized pump wastes money and can short-cycle, while an undersized one won’t solve the problem. A supplier or installer who asks about your house and supply, rather than just selling the biggest unit, is the one to trust.

    Pressure pumps are one part of the household water picture — see how they relate to tanks, ponds and efficient watering in our guide to water in the Australian garden.

  • How to Build a Garden Pond: A Beginner’s Step-by-Step for Australian Backyards

    How to Build a Garden Pond: A Beginner’s Step-by-Step for Australian Backyards

    Building a garden pond is well within reach for a weekend-handy homeowner: choose a level, partly shaded spot, decide how big and deep you want it, dig and shape the hole, line it, add water movement, then plant it and let it settle. The two parts to leave to professionals are the pump’s electrical connection (a licensed electrician) and checking whether your council has depth or fencing rules. Here’s how it comes together.

    Choosing the spot

    The right position makes everything easier. Look for somewhere that gets a few hours of sun but isn’t baking all day — too much sun feeds algae, too little starves your plants. Avoid the lowest point of the yard where stormwater runoff and garden chemicals will wash in. A reasonably level area saves you a lot of grief when it comes to getting the water line even.

    Safety matters too. If young children use the garden, think carefully about open water. Some councils treat ponds over a certain depth like pools and may have fencing or barrier requirements, so check your local council’s rules before you dig.

    How big and how deep

    Bigger ponds are actually more forgiving — a larger volume of water stays more stable in temperature and chemistry than a tiny one. For depth, you generally want a deeper zone so the water doesn’t overheat in summer and so fish, if you keep them, have somewhere cooler to retreat. Shallower margins around the edge give plants a home and let wildlife get in and out. There’s no need to chase exact figures; scale it to your yard and how much maintenance you’re happy to do.

    Flexible liner vs preformed shells

    You’ve got two main ways to hold the water. A flexible liner lets you make any shape and size you like and tends to suit larger, natural-looking ponds; it’s draped into the hole and shaped as you go. A preformed shell is a rigid moulded pond you drop into a matching hole — quicker and simpler for a small pond, but you’re locked into its shape and size. For a first pond, a preformed shell is the easy option; for something organic and bigger, a liner gives you freedom.

    Digging, shelving and edging

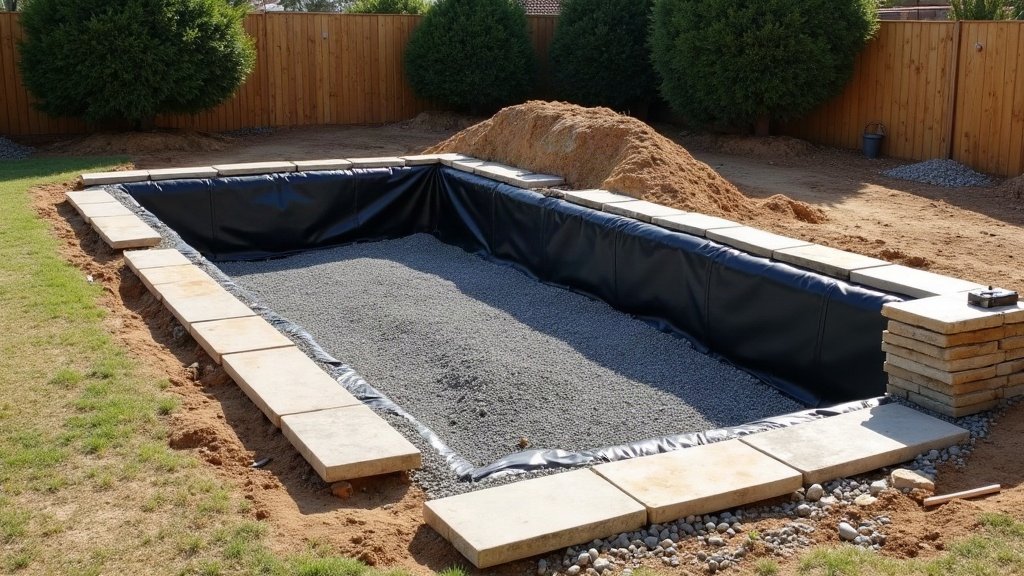
    Mark the outline, then dig in stages, cutting a shallow shelf around the perimeter for marginal plants and a deeper central zone. Remove sharp stones and roots, and add a layer of sand or underlay to protect a liner. Set your liner or shell, check the rim is level all the way round, then fill slowly so it settles into shape. Finish the edge with rocks, pavers or plants to hide the liner, hold it down and create a natural transition into the garden.

    Water movement: why most ponds need a pump

    Still water tends to go stagnant, grow algae and lose oxygen. A pump keeps water circulating — running a small fountain, a spillway or a filter — which keeps it clearer, better oxygenated and healthier for fish and plants. Choose a pump suited to your pond’s size and what you want it to do, whether that’s a gentle ripple or a proper waterfall.

    Position and plumb the pump yourself if you like, but the electrical connection must be done by a licensed electrician, on an outdoor RCD-protected circuit. Mains power beside a body of water is exactly the situation those rules exist for — it’s not a DIY step.

    Planting and letting it settle

    A new pond needs time. Add a mix of plants — submerged oxygenators, marginal plants on the shelves, and a floating-leaf plant or two for shade — and then be patient. The water may go cloudy or green at first while it finds its balance; that’s normal. Hold off adding fish until the pond has settled for a few weeks and the plants are established. Top up with rainwater where you can, and resist the urge to fiddle. Within a season most ponds find their rhythm.

    A pond is one piece of the bigger water picture — see how it sits alongside pumps, features and water-wise design in our guide to water in the Australian garden.