Want the sound of running water without a pond to maintain? That is exactly what a pondless waterfall gives you. Water tumbles over rock, then disappears into a hidden reservoir underground and gets pumped straight back up to do it all again. No open pool of standing water, no fish to look after, and a lot less to go wrong.
What a pondless waterfall actually is
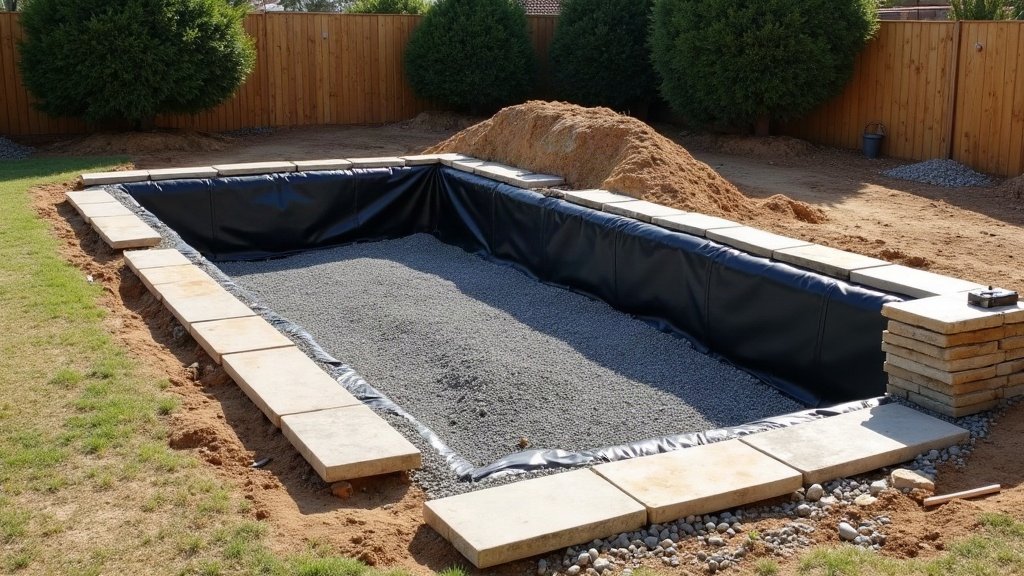
A standard pond holds its water in a visible basin lined with a liner or a preformed shell. A pondless waterfall flips that around: the water still sits in a liner-lined basin, but that basin is buried and covered with gravel and rock so all you ever see is the waterfall itself. The reservoir underneath holds the water, a submersible pump keeps it circulating, and the whole system tops itself up as it runs.
The effect is the same movement and sound as a pond-fed waterfall, just without a visible body of water sitting there between uses.
Why families and low-maintenance gardeners choose them
A few practical reasons this style keeps coming up in smaller Australian backyards:
- Safety: there is no open water for a toddler to wander into, which matters a lot for young families and for anyone with grandkids visiting.
- Upkeep: no fish to feed, no algae blooming in open water, no netting for leaves floating on a pond surface.
- Footprint: the reservoir can be sized to fit an odd corner or a narrow side yard that would never fit a proper pond.
- Flexibility: because there is no visible water body, the feature can be tucked right up against a fence line, a deck or a garden bed without the safety and space concerns a pond raises.
If you love the sound and movement of water but do not want another thing to manage on the weekend, this is usually the format people land on.
How the reservoir and pump actually work together
Underneath the rock you see, there is a buried basin (sometimes a rigid tank, sometimes a flexible liner shaped into a pit) that holds the working volume of water. A submersible pump sits in that reservoir, pushes water up through hidden tubing to the top of the waterfall, and gravity does the rest as it runs back down over the rock and gravel and soaks back into the reservoir below.
Because the water is always moving and never sits exposed to full sun the way a shallow pond edge does, algae growth is generally far less of an issue than it is in an open pond.
Sizing and siting: match the system, do not guess it
The reservoir needs enough capacity to hold the water that is “in transit” up on the waterfall and in the tubing at any given moment, plus a buffer for evaporation between top-ups. A taller, wider waterfall moves more water through the system at once and needs a larger reservoir and a pump matched to that flow, while a small, tucked-away feature can run on a much smaller setup.
Siting matters just as much as sizing. A gentle existing slope makes the build far easier than flat ground, and you want a spot where the sound carries to where you actually sit, not off toward a side fence nobody uses. One thing people skip at this stage is what is already growing in that spot: a reservoir pit is a real excavation, and cutting through the structural roots of an established tree to make it fit can leave that tree unstable years later. If the spot you like sits under a mature canopy, get an on-site assessment from an arborist like Waratah Professional Tree Care before the shovel goes in. Keep the final pump and reservoir size decision for the specific feature you are building rather than copying numbers from a different yard: every waterfall’s height, width and flow rate changes what it needs.
The build, at a high level
Most pondless waterfall builds follow the same broad sequence:
- Dig the basin: sized for your reservoir, in the spot you have settled on.
- Set the reservoir: either a rigid basin or a liner shaped and secured into the hole.
- Place the pump and plumbing: pump in the reservoir, tubing run up to where the waterfall will spill from.
- Build the rock structure: the actual waterfall shape, using rock and boulders to create the fall and the sound.
- Cover with gravel: gravel and stone laid over the reservoir lid so nothing but rock and water is visible from above.
- Fill, test and adjust: fill the reservoir, run the pump, and adjust rock placement until the water flow and sound are right.
It is fiddly work getting the rock placement right so the water falls where you want it rather than sheeting off sideways, so budget more time for that stage than you think you will need.
Power, safety and keeping it running
The pump needs a fixed power connection, and that outdoor point should always be wired by a licensed electrician onto a properly RCD-protected circuit. Do not run a permanent water feature off an extension lead as a long-term solution.
Once it is running, upkeep is genuinely light. Top up the reservoir occasionally to cover evaporation, especially over a hot stretch, clear leaves and debris out of the rock structure a couple of times a year, and check the pump is still moving water freely rather than labouring. That is about the extent of it.
If you are still weighing this up against a traditional pond, our guide to building a garden pond walks through the fuller build process for an open water feature, and our rundown on submersible versus surface pumps explains the pump side of either option in more depth. Both link back to our full guide to water in the Australian garden.