Category: Pumps

  • Sizing a Pond Pump: Matching Flow to Pond Volume and Waterfall Height

    Sizing a Pond Pump: Matching Flow to Pond Volume and Waterfall Height

    Two numbers decide which pond pump you buy: how much water the pond holds, and how hard the pump has to work to move it. Get the volume and the head height right and you land on a sensible pump the first time, instead of buying twice.

    Start with the volume, not the pond

    Measure length, width and average depth in metres, multiply the three together, then multiply by 1000. That gives you litres. A pond three metres long, two metres wide and half a metre deep on average holds about 3000 litres.

    Average depth is the bit people fudge. Most backyard ponds have a shallow planting shelf around the edge and a deeper section in the middle, so the average sits well under the deepest point. Use the deep measurement and you will overstate the volume, sometimes badly.

    If the pond is an odd shape, break it into rough rectangles and add them up, or read your water meter before and after filling. Filling a new pond is the one time you get an exact figure for free, so write it down somewhere you will find it again.

    The turnover rule of thumb

    The working rule most pond people use is to circulate the whole volume once an hour. So a 3000 litre pond wants a pump moving roughly 3000 litres per hour. That figure keeps water passing through the filter often enough to stay clear and keeps oxygen moving.

    Adjust it for what is living in there:

    • Lightly planted ornamental pond, no fish: turning the volume over every two hours is usually plenty.
    • Standard mixed pond with a few goldfish: once an hour is the safe default.
    • Koi pond: koi are heavy waste producers, so aim for a full turnover every hour as an absolute minimum and size the filter to match.

    Turnover is really about the filter doing its job, and our guide to pond filtration and UV clarifiers covers how the two decisions fit together.

    Head height is where most people come unstuck

    Pumps are advertised at maximum flow, which is what they deliver pushing against nothing at all. Ask one to lift water and shove it through pipe and the flow drops away. Ignore that and a pump rated at 6000 litres per hour turns into a dribble at the top of your waterfall.

    Total head is two things added together. Static head is the vertical distance from the pond surface up to the point where the water pours out. Friction loss is everything the water fights on the way: metres of pipe, every bend, the filter, the UV unit, any fittings that pinch the flow down.

    You cannot calculate friction loss precisely in a backyard without a chart, so add a sensible allowance. On a short run of correctly sized pipe with a couple of gentle bends, half a metre to a metre on top of the vertical rise gets you close enough. Then read the pump’s performance curve, which every decent manufacturer publishes, at that total head figure. That number is the one that matters.

    A waterfall changes the sum entirely

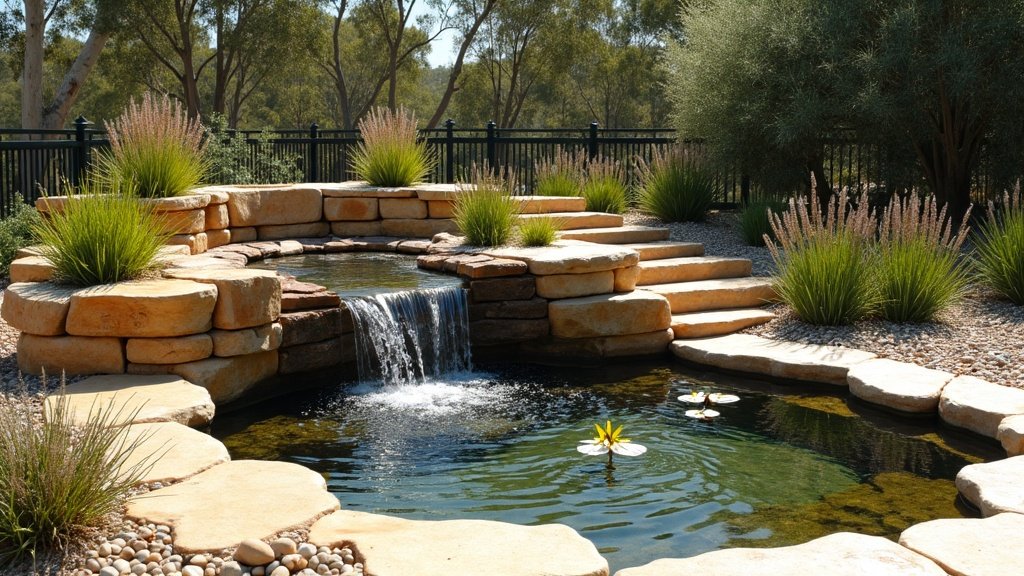
    Once a waterfall or spillway is involved, flow gets judged by the eye, not the filter. A wide spillway with not enough behind it looks like a leaking gutter.

    The starting point widely used in the trade is around 1500 litres per hour for every 10 centimetres of spillway width, which gives a modest sheet. Want a thicker curtain that reads as a proper waterfall? Roughly double it. A 40 centimetre spillway on that basis wants somewhere near 6000 litres per hour.

    Now compare that against your turnover figure and take whichever is larger. The 3000 litre pond above wanted 3000 litres per hour for filtration, so the waterfall governs. If that number costs more to run than you are willing to wear, narrow the spillway rather than starving it.

    Plumbing choices that quietly cost you flow

    • Pipe diameter: go one size up from the pump outlet rather than down, because narrowing the pipe costs you more flow than any other single decision.
    • Sweep bends over sharp elbows: each tight elbow behaves like several extra metres of pipe.
    • Short runs: every metre of hose between the pump and the waterfall is friction you paid for and never see.
    • A valve on the outlet: fitting one lets you trim a slightly generous pump back to the look you want, which is far easier than living with one that is undersized.

    Whether the pump sits in the water or beside it is a separate decision with its own tradeoffs, and we have walked through that in the guide on submersible versus surface pumps.

    Putting it together

    Take that 3000 litre pond with a 40 centimetre spillway sitting 1.2 metres above the water and six metres of pipe running to it. The flow target is 6000 litres per hour because the waterfall governs. Total head is 1.2 metres of lift plus an allowance for pipe, bends and filter, so call it two metres. You are shopping for a pump that still delivers about 6000 litres per hour at two metres of head, which is a noticeably bigger unit than one whose box says 6000.

    Where the do it yourself part stops

    Plugging a pump into an existing weatherproof outdoor outlet is a homeowner job. Installing that outlet, running a new circuit or hard wiring anything is licensed electrical work everywhere in Australia, so it goes to a licensed electrician. Your state or territory electrical safety regulator is the authority on what needs a licence and what protection the circuit requires.

    Sizing is far easier when the pond gets designed around the pump, which is why pump position comes up early in the step by step guide to building a garden pond. And if the pond will sit near where small children play, ask your local council about barrier requirements before you dig, because the rules vary by state and by depth.
  • Caring for Ponds and Pumps Through the Cold Months

    Caring for Ponds and Pumps Through the Cold Months

    In most of Australia, winter pond care is refreshingly boring: leave the pump running, cut the feeding right back, and keep the leaves out. Shutting the whole system down for the cold season is a frost country job, and even there it is more about protecting the equipment than protecting the fish. A pond of any decent volume holds warmth far better than the air above it, so the fish near the bottom are having a gentler winter than your back verandah suggests.

    Leave the pump running unless you have a real reason not to

    The most common winter mistake is switching everything off in May and turning it back on in September. It feels sensible. It is not.

    Your biological filter is a living colony of bacteria sitting on the filter media, and those bacteria convert fish waste into something harmless. They slow right down in cold water but they do not disappear. Cut the flow for a few weeks and they starve and die off. Fire it back up in spring and you have a filter full of nothing, a pond full of hungry fish and an ammonia spike heading your way. That is behind a lot of the fish losses people blame on spring. More on it in the guide to pond filtration and UV clarifiers.

    Moving water also keeps oxygen going in and the gases from decomposition coming out. A still pond with a layer of rotting leaves on the bottom is a far worse place to be a fish than a cold one. If the running cost is what is bothering you, read the wattage off the pump’s rating plate rather than guessing.

    Feed less, and feed differently

    Cold water slows a fish’s metabolism right down. The rule of thumb most pond keepers work to is that once the water sits below roughly 10 degrees, a goldfish or koi is not properly digesting what it eats, and undigested food fouls the water on the way out.

    • Switch to a wheat germ based food: it is formulated to break down more easily in cold water than a high protein summer pellet.
    • Feed in the warmest part of the day: early afternoon, not first thing on a frosty morning.
    • Feed only what disappears in a couple of minutes: anything still floating afterwards goes to the filter as waste.
    • Stop altogether when they stop coming up: fish sitting on the bottom ignoring food are done for the season.

    They will not starve. A healthy fish that went into winter with condition on it is built for exactly this. There is more on reading fish behaviour in our piece on keeping fish healthy in a backyard pond.

    The frost country exception

    On the Tablelands, around Canberra, in the Victorian high country or the Tasmanian highlands you have a genuine freezing problem, and it is the equipment at risk more than the pond.

    Water expands as it freezes, so any water left sitting in a pump body or an exposed pipe can crack the housing, and you will not find out until you switch on in spring and stand in the puddle. If you pull a pump out for the season, drain it, dry it, and store it somewhere that does not freeze. Lag any pipework you cannot drain.

    For the pond itself, depth is your friend, which is worth getting right when you build the pond. If ice does form, do not smash it: you would be hammering on the surface of a pond full of fish that are barely moving. Sit a pot of hot water on the ice to melt a hole, or keep a small area open with an air stone.

    Turn spray features down or off in freezing weather. Throwing water into freezing air chills the pond fast, and splash on paving becomes an ice sheet the postie will find the hard way.

    Leaves, plants and the things that quietly cause trouble

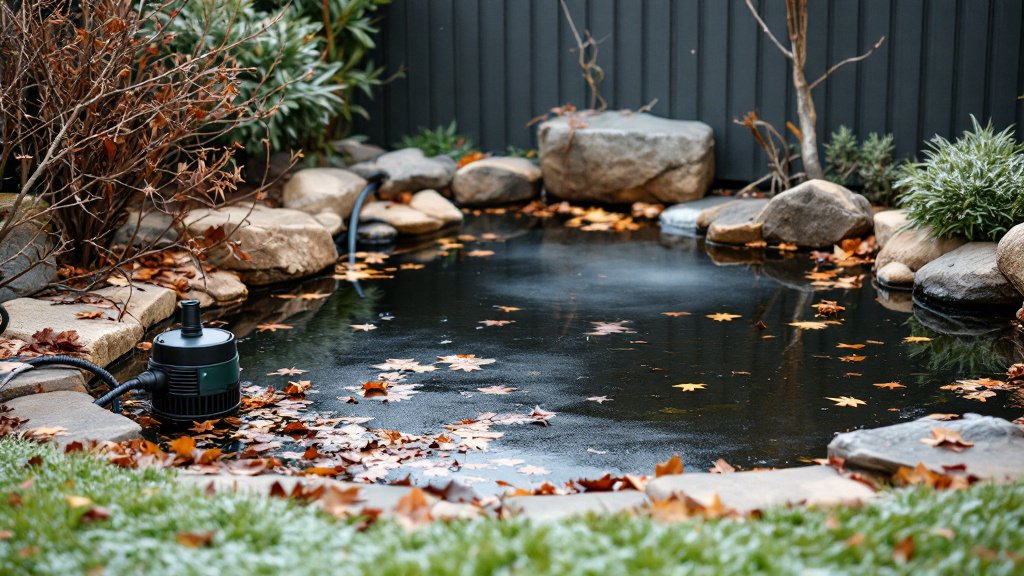
    Leaf drop causes most of the cool season water quality grief. Leaves sink, rot and pull oxygen out of the water. A net over the pond for the worst of the drop is cheap. Skim whatever gets through before it sinks.

    Cut back marginal and aquatic plants as they die off rather than letting them collapse into the water and rot there. Keep the water topped up too. A few other things worth checking while you are down there:

    • Pump intake and pre-filter: cold weather debris blocks these just as fast as summer weed does, and a starved pump runs hot.
    • The UV lamp: green water is far less common in the cold and UV lamps have a limited useful life, so turn the lamp off if you like, but leave the pump and filter going.
    • Leads and connections: look for perished insulation, cracked plugs and anything sitting in a puddle.
    • Any pump that has sat dry: turn the shaft over by hand before you power it up, because mechanical seals stick when they dry out.

    Where the do it yourself part stops

    Plugging a pond pump into an existing outdoor socket is a homeowner job. Fixed wiring, a new outdoor circuit or a hardwired isolator is licensed electrical work everywhere in Australia and has to be done by a licensed electrician. Check with your state regulator: Energy Safe Victoria, NSW Fair Trading, or the Electrical Safety Office in Queensland. Whatever you run outdoors should be protected by an RCD.

    Coming out the other side

    Spring is where good winter work gets undone. Resist the full clean out on the first warm weekend, because scrubbing filter media under the tap kills the bacteria colony you just spent three months protecting. If the media genuinely needs it, rinse it in pond water and leave the rest alone.

    Bring the feeding back gradually as the water warms, starting with the wheat germ food. Give any stored pump a look over first: seals, impeller, and whether it draws water within a minute.

  • How to Prime a Water Pump (and Why It Keeps Losing Prime)

    How to Prime a Water Pump (and Why It Keeps Losing Prime)

    Priming a surface pump means filling the casing and the suction line with water before you switch it on, because an impeller can move water but not air. Prime a healthy system once and it holds for months. If yours needs priming every weekend, priming is not really the problem: air is getting into the suction side, or water is draining back out of it, and that is the fault worth chasing.

    Which pumps need priming

    Anything sitting above the water it draws from needs prime: jet pumps, transfer pumps and most household pressure pumps beside a tank. A submersible sits down in the water and never has the problem, an advantage worth remembering when weighing up submersible against surface pumps. Self priming pumps clear air out of the suction line once the casing is full, but they still need that first fill.

    Priming a surface pump, step by step

    1. Kill the power at the isolation switch or pull the plug. Do not do any of this with the pump live.
    2. Open a tap on the discharge side so trapped air has somewhere to escape as you fill.
    3. Unscrew the priming plug on top of the casing. On most domestic pumps it is a brass or plastic cap right above the impeller housing.
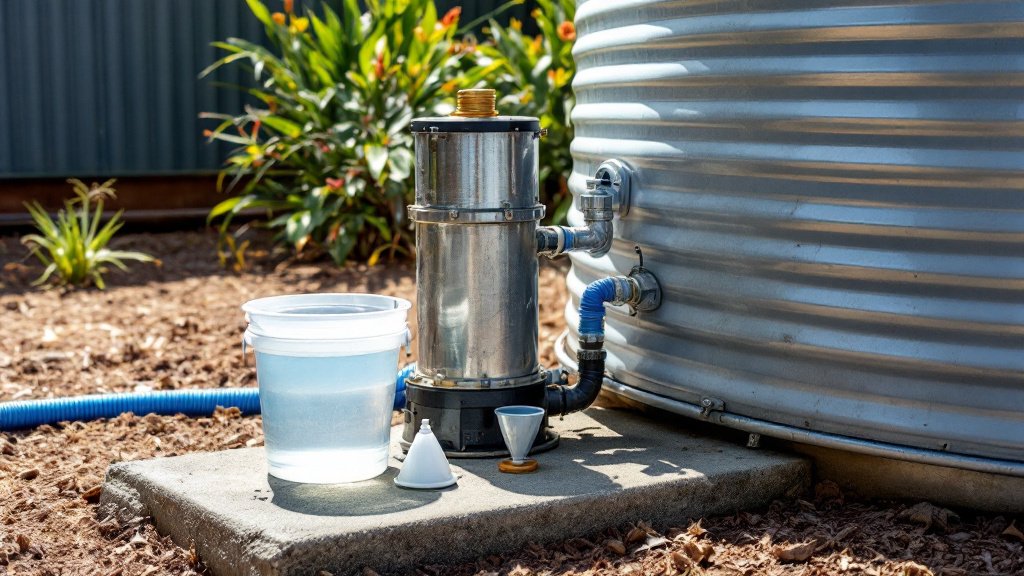
    4. Pour clean water in slowly until the casing is full to the top of the opening, and if the suction line rises to the pump, keep going until that fills too. A funnel and a bucket beat a hose, because you can see what is happening.
    5. Let it settle. The level usually drops as air works out, so top it up until it stops falling.
    6. Refit the plug with its washer or o ring seated properly, and do not overtighten a plastic one.
    7. Restore power and start the pump with the discharge tap still open. You should get spluttering, then air, then steady water.
    8. If it has not pulled water through after a short run, switch off and prime again rather than letting it churn.

    Running it dry is what actually kills pumps

    The mechanical seal behind the impeller uses the water passing through it for lubrication and cooling. With no water there it is running dry against a spinning shaft, and it does not take a long run to ruin it. A pump that will not take prime should be switched off and diagnosed, not nursed along with repeated starts.

    Why the prime keeps disappearing

    If you are repriming regularly, one of these is almost always behind it:

    • A failed foot valve or non return valve: the most common cause by a mile. That valve holds the water column in place when the pump stops, so let grit hold it open or the rubber seat perish and the line drains back overnight.
    • An air leak on the suction side: the inlet line is under vacuum while the pump runs, so a bad joint sucks air in rather than dripping water out. That is why you can walk the line hunting for wet patches and find nothing. Barrel unions, poly fittings and the o ring at the pump inlet are the usual offenders.
    • The water level dropping below the strainer: a tank running low or a dam falling away through summer leaves the foot valve gulping air. Sometimes the level is fine but a vortex forms above the strainer and drags air down.
    • A blocked or silted strainer: choke the inlet and the pump cavitates, which sounds like gravel rattling through the casing.
    • Too much suction lift: every pump has a maximum height it can draw water up, and that figure is on the pump plate or in the manual. Mount it higher, or add a long run of undersized pipe, and it will struggle.

    Finding the fault without guessing

    The cheapest test is the overnight one. Prime the pump, run it, shut everything down and leave it. In the morning, pull the priming plug. Casing still full means the suction side is sound and you should be looking downstream. Casing empty means water has drained back, which points hard at the foot valve or a leak low in the line.

    From there, work up. Pull the foot valve and inspect the seat and the basket rather than assuming it is fine because it looks clean. Redo any suction joints you are unsure of with fresh thread tape or new o rings, because a joint that seals against pressure will not necessarily seal against vacuum. If the pump holds prime until you draw hard on it, suspect the strainer or the water level, not the fittings. Rule out one thing first: a pump starting and stopping in short bursts is a different fault with a similar feel, so read up on a pump cycling on and off before you pull the suction line apart.

    Setting the line up so it stops happening

    Most repeat priming problems are layout problems. Keep the suction line short, straight and on a continuous rise toward the pump so air cannot pool in a high spot, use the pipe size the manufacturer asks for, keep the joint count down, and sit the foot valve below the lowest water level you expect in a dry spell.

    Where the do it yourself part stops

    Filling a casing and changing a foot valve are homeowner jobs. Anything involving the pump’s wiring, its terminals or the circuit feeding it is electrical work, and in Australia that must be done by a licensed electrician under your state or territory electrical safety regulator. If the pump ties into your mains or potable supply, or backflow prevention is involved, that side belongs to a licensed plumber under your state plumbing regulator. Drawing from a bore or a watercourse brings its own approvals, so check with your state water authority.

    Get the foot valve and the suction joints right and priming becomes something you do once after maintenance, not a weekly ritual with a bucket.

  • Why Your Water Pump Keeps Cycling On and Off (And What It Means)

    Why Your Water Pump Keeps Cycling On and Off (And What It Means)

    If your pump clicks on and off every few seconds instead of running a steady burst, it is short cycling, and it almost always comes down to one of three things: the pressure tank has lost its air charge, water is escaping somewhere, or the pressure switch has stopped reading properly. None of those fix themselves, and a pump that starts and stops all day will wear out its motor and switch contacts far quicker than one running proper cycles. Here is how to work out which one you have.

    What short cycling actually is

    A pressure system is meant to work in a rhythm. You open a tap, pressure drops, the switch senses that drop and kicks the pump on. The pump lifts the pressure back up until the switch senses the upper limit and shuts it off. That cycle should take a decent stretch, not a heartbeat.

    Short cycling is when the rhythm collapses and the pump runs for a second or two, stops, then starts again straight away. You will hear it before you see it: a rapid tick, tick, tick from the pump shed or the side of the house, sometimes with the taps pulsing. The pump is cramming a full day of starting work into a few minutes, and motor starts are the hardest thing a pump ever does.

    The pressure tank is the usual suspect

    Most pressure systems have a small tank beside the pump, and inside it is a rubber bladder with a cushion of air on one side. That air stores the pressure so the pump can rest between draws. Lose the air and there is nothing left to store it in, so the pump switches on the instant you crack a tap and off again the moment you close it.

    Two things go wrong here. The air charge slowly leaks away over the years, which is normal and rechargeable. Or the bladder splits, which is not rechargeable and means a new tank. To tell them apart on a small tank, press the air valve on top with the system switched off and depressurised. A puff of air suggests a charge problem you can top up. Water coming out of the air valve means the bladder has failed.

    Do not go hunting for a magic pressure number online. Every tank has its own correct pre-charge, set relative to the pump’s cut-in point. Use the plate on your tank and the pump manufacturer’s instructions, not something you read on a forum.

    Leaks bleeding pressure while nothing is running

    If the tank checks out, suspect water going somewhere it should not. A healthy system sits still for hours with everything closed. If your pump fires up in the middle of the night with no tap open, something is leaking. Common places to look:

    • Toilet cisterns: a worn flush valve trickles quietly and is the most common cause of a pump kicking on overnight.
    • Outside taps and garden fittings: a slow weep at a hose fitting or a cracked poly joint will do it.
    • The foot valve or non-return valve: if it fails, water drains back down the suction line and the pump loses prime between cycles.
    • Buried irrigation lines: a split under mulch or lawn loses plenty without ever showing on the surface.

    The simple test is isolation. Shut the valve between the pump and the house and watch the gauge. If pressure holds while the house is isolated but falls once you open it back up, the problem is downstream in the plumbing. If it falls either way, look at the pump, the tank and the non-return valve.

    A pressure switch or controller on the way out

    The switch tells the pump when to start and stop, and it lives a hard life. Contacts pit and burn over time, and the small sensing port that reads water pressure can silt up or corrode until the switch is reading a fraction of what is really happening. Either fault gives the same symptom: a pump starting and stopping on a hair trigger. Electronic controllers fail their own way, with a sticking flow sensor or a scaled up sensing chamber convincing the unit you are still drawing water when you are not.

    Diagnosing a switch properly means working around live terminals, and that is where the job stops being a homeowner one.

    What you can safely check yourself

    With the pump switched off at the isolation point, you can watch the gauge over an hour to see whether the system holds, walk the property listening for leaks, drop food colouring in each toilet cistern to see whether it seeps into the bowl, look for damp patches around fittings, and read the plate on your tank and pump. Recharging a pressure tank with a bicycle or compressor pump is within reach for a lot of people, but only once the system is isolated and fully depressurised, and only to the figure on the plate.

    When to stop and call a licensed trade

    Anything involving the pump’s wiring, its terminals, the pressure switch contacts or the supply circuit is electrical work, and in Australia electrical work must be carried out by a licensed electrician. That is not a guideline, it is the law in every state and territory, enforced by the relevant electrical safety regulator. Opening a switch cover to poke at contacts on a live pump is the kind of shortcut that kills people. Leave it and make the call.

    If the fix touches your mains connection, potable supply or backflow prevention, that is a licensed plumber’s job under your state plumbing regulator. Garden irrigation on the outlet side is generally fair game, but the moment work joins the drinking water system it needs a plumber.

    The good news is that most short cycling comes back to a flat pressure tank or a leaking toilet, and both are cheap to sort. Chase those two first and you will fix most cases before anyone touches a wire.

  • Bore and Well Pumps: A Plain-English Guide for Australian Properties

    Bore and Well Pumps: A Plain-English Guide for Australian Properties

    On a rural block or a big bush property, a bore can be the difference between hauling water in a tank on the ute and just turning on a tap. But the hole itself does nothing without a pump, and the pump is where most of the head scratching happens. Choose the wrong one and you either burn it out chasing water that sits too deep, or pay for grunt you will never use. Here is how bore and well pumps work, and how to pick the right one.

    When a bore or well pump makes sense

    Bore water suits properties where mains supply is either not connected or too dear for the big jobs: filling stock troughs, running irrigation across a few acres, or keeping a house going off tank and bore together. If you only need a bit of extra garden water, a rainwater tank and a small pressure pump is usually the cheaper path. A bore earns its keep once your demand is steady and high enough that a reliable underground source beats carting or metered town water. The trade-off is the commitment: you need a driller to put the hole down, a pump matched to that hole, and in most states an approval before anyone drills.

    Submersible bore pumps versus surface jet pumps

    There are two broad families of pump for a bore, and which one suits comes down mostly to how far below the surface the water sits.

    • Submersible bore pumps: the whole unit drops down inside the bore casing and sits under the water, pushing it up the pipe from below. Because they push rather than suck, they handle deep water a surface pump cannot reach, and they run quietly down the hole.
    • Surface jet pumps: these sit up top in a shed and draw water up through a suction line. They are easier to service and cheaper to start with, but they can only pull water up so far before the physics beats them. Once the water sits beyond the reach of suction, a surface pump is the wrong tool.

    As a rough rule, shallow water leans towards a surface pump and deep water needs a submersible. But do not guess it off a blog: size it against your actual bore, which brings us to the numbers that matter.

    Why bore depth and water level drive the choice

    The most important thing about your bore is not how deep the hole is, it is where the water sits and how far that level drops once you start pumping. When a pump runs, the water falls to what drillers call the drawdown level, and the pump has to lift from there, not from the resting level. A decent bore report or driller’s log gives you the standing level, the drawdown and the yield, and those are the figures a supplier uses to match a pump to your hole. Never let anyone size a pump without them, and never just copy a neighbour’s setup, because two bores a paddock apart can behave completely differently.

    Water quality, sediment and filtration

    Bore water is not automatically clean water. Depending on your area it can carry sand and silt, run high in iron that stains everything a rusty orange, or sit at a pH that slowly chews through fittings. None of that stops you using it for stock or garden, but a water test early on saves you buying the wrong gear:

    • Sediment: grit wears pumps out and blocks drippers, so a sand separator or sediment filter is common on grittier bores.
    • Iron and minerals: these cause staining and scale that a specialist should sort.
    • Drinking water: bore water is not safe to drink until it has been tested and, where needed, treated. Treatment and health rules are matters for your state health or water authority, not something to eyeball.

    Bore licensing and groundwater rules

    This is the part people skip and then regret. In Australia, drilling a bore and taking groundwater is regulated by each state and territory, and the rules genuinely differ from one border to the next. Depending on where you are, you may need a licensed driller, a works approval before drilling, and a licence to take water, with limits on how much you can pull and what you can use it for. So the only right answer is to check with your state or territory water authority before you drill. Do not take a rule you read online, this guide included, as the final word for your own patch.

    Who installs and connects it

    A bore pump job touches two licensed trades.

    • Electrical: any bore pump beyond a plug-in portable needs its power supply wired in on an outdoor rated circuit protected by a safety switch. That wiring is a licensed electrician’s job.
    • Plumbing: the moment bore water is connected into your house plumbing, or anywhere near your drinking water supply, you are into licensed plumbing territory, including the backflow prevention that keeps the two supplies from crossing. A licensed plumber such as CS Plumbing Services handles that connection so the bore feeds the house safely and to code.

    Typically the driller puts the hole down and often drops the pump, the electrician powers it, and the plumber ties it into the house. Keep those roles clear and you avoid the classic bore headache: a pump that runs beautifully but is wired or plumbed in a way that fails an inspection.

    The short version

    A bore is a great long-term water source for the right property, but the pump makes or breaks it. Match it to your bore’s real water level and drawdown rather than the total depth, go submersible for deep water and surface only for shallow, test before you treat, and sort the licensing and the licensed trades first. For how this fits alongside tanks and ponds, see our guide to water in the Australian garden, and for pump types more broadly, our explainer on submersible versus surface pumps.

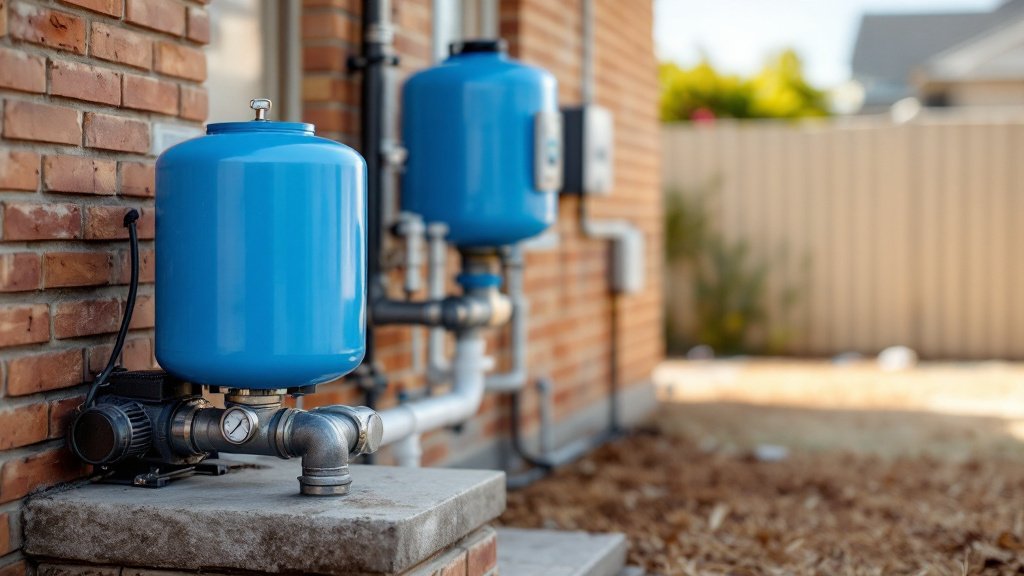
  • Pool Pumps Explained: Sizing, Running Costs and Energy Efficiency

    Pool Pumps Explained: Sizing, Running Costs and Energy Efficiency

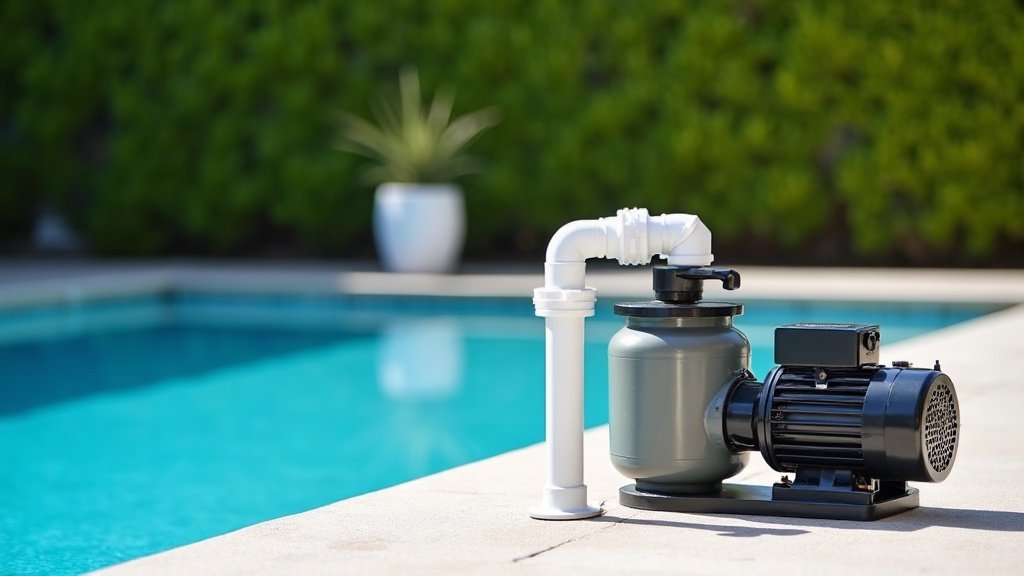
    If your pool pump is the single biggest power user in the house, you are not imagining it. The pump is what keeps a pool clean and safe to swim in, so how you size it and how you run it makes a real difference to both water clarity and your electricity bill. The good news is that getting it right is mostly about matching the pump to your pool and running it smartly, not chasing the most powerful unit on the shelf.

    What the pump actually does

    A pool pump is the heart of the filtration circuit. It pulls water from the skimmer and the main drain, pushes it through the filter to strip out dirt and debris, sends it past the chlorinator or dosing gear, and returns clean water to the pool. Nothing else in the system works without that flow. If the pump is undersized or clogged, the filter can’t do its job and the water goes cloudy or green. If it is wildly oversized, you are just burning power, and you can even push water through the filter faster than it can properly clean.

    Single-speed versus variable-speed pumps

    There are two broad types you will come across:

    • Single-speed pumps: they run flat out whenever they are switched on, at one fixed speed. Cheaper to buy and simple, but they draw the same power whether you need full flow or not.
    • Variable-speed pumps: you can dial the speed up or down to suit the task, running slow and quiet for everyday filtering and faster only when you are vacuuming or backwashing.

    Most of a pool’s daily filtering doesn’t need full flow. That is the whole case for a variable-speed pump, and it is why they have become the default recommendation for new installs.

    Why variable-speed usually costs less to run

    The savings come down to how pumps use energy. Running a pump slower uses a good deal less power than running it flat out, so a variable-speed unit ticking over gently for most of the day draws far less than a single-speed pump hammering away at full noise. Across a whole filtering season that difference adds up. I won’t put a dollar figure on it, because it depends on your pool, your tariff and your hours, but the pattern is consistent: slower and longer beats fast and short for everyday filtering.

    Matching the pump to your pool

    The goal is turnover, meaning you filter roughly the whole pool volume over a set period so the water stays clean. A bigger pool, or one with plenty of swimmers and leaf litter, needs more turnover than a small, sheltered plunge pool. Rather than guessing, work from your actual pool volume and the filter you already have, and let a pool shop or installer match a pump to it. Bigger is not better here. An oversized pump costs more to buy, more to run, and can strain an undersized filter. A right-sized pump quietly does the job for less.

    Running times and off-peak

    You don’t have to run a pool pump around the clock. The aim is enough total turnover across the day, and you have some freedom in when that happens. Two habits help:

    • Split the run: a couple of shorter cycles, timed around when the pool actually gets used, often keep the water clearer than one long block.
    • Lean on off-peak: if you are on a time-of-use tariff, shifting filtering to cheaper off-peak hours trims the cost without cutting the turnover.

    Warmer months and heavy use call for more running time. Through winter, when the pool is barely touched, you can usually wind it right back. A timer, or a variable-speed pump’s built-in schedule, makes this close to set-and-forget.

    Repair or replace an ageing pump

    Pumps don’t last forever. A screeching motor, a pump that keeps losing prime, leaking seals, or a unit that trips the power are all signs something is on the way out. A worn seal or a blocked impeller is often a straightforward fix. But if you are nursing an old single-speed pump through repair after repair, swapping it for a modern variable-speed unit often pays for itself in running-cost savings before long. When you do replace it, remember one hard rule: the electrical connection of the pump is a licensed electrician’s job, not a DIY exercise for any hard-wired unit. And because pool areas carry their own safety and fencing requirements that vary by state, check your local requirements rather than assuming.

    Get the sizing right, run it on a sensible schedule, and a pool pump becomes the quiet, efficient workhorse it is meant to be.

  • Sump and Stormwater Pumps: Keeping Water Out of Your Home

    Sump and Stormwater Pumps: Keeping Water Out of Your Home

    Every time a decent storm rolls through, the water pools against the back slab and starts creeping toward the door. You bail it, you sweep it out, and the next downpour it is right back. That is the exact job a sump or stormwater pump is built for: shifting water that has nowhere else to go, before it gets inside. Here is how they work, how to tell a pump problem from a plain drainage problem, and who should be doing the connecting.

    What a sump or stormwater pump actually does

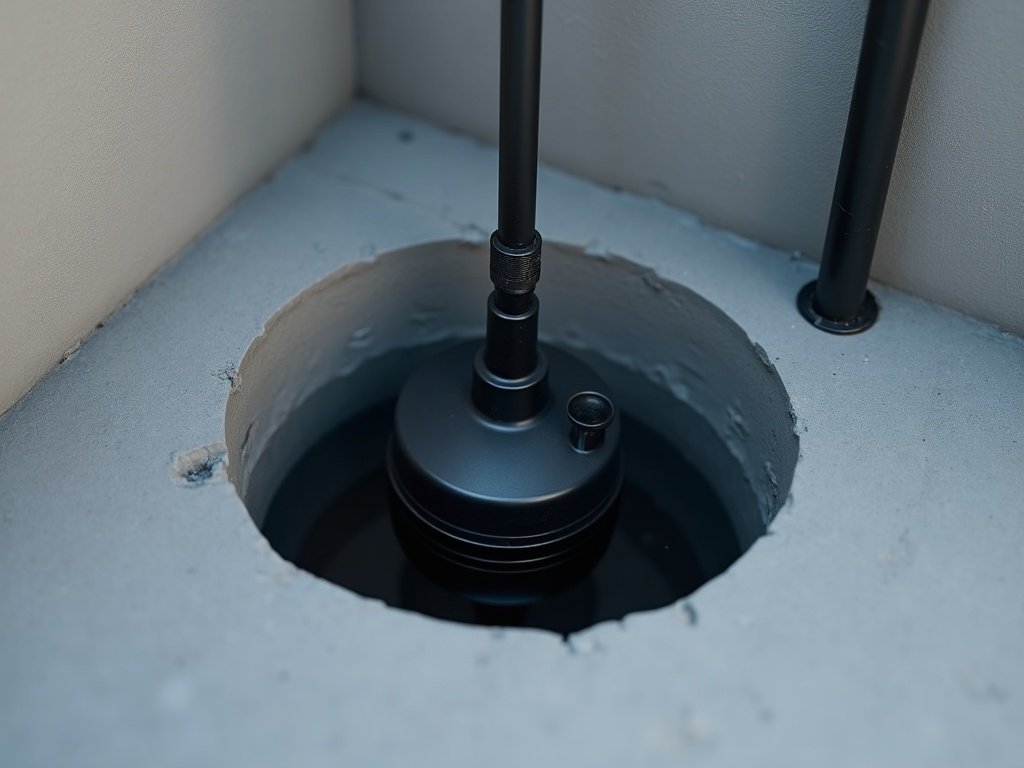
    A sump pump sits in a pit at the lowest point of a space that keeps flooding: a garage, a laundry, a shed floor or a boggy yard corner. Water drains into that pit, the pump senses it, and it lifts the water up and out to somewhere it can drain away safely. A stormwater pump does the same job on a bigger scale, clearing the runoff a heavy storm dumps faster than your normal drains can carry it off. Both are usually submersible units that sit down in the water rather than perched above it, and our submersible vs surface pumps guide covers that style versus a surface pump. Worth saying too: not every drop has to be pumped to waste, the clean roof runoff is often worth catching in a tank, which our rainwater harvesting guide covers, but a sump is about the water that has already pooled where you do not want it.

    The pit, the float switch and how it runs itself

    The clever part of a sump setup is that it looks after itself. You are not meant to stand there flicking it on. Three bits do the work.

    • The pit: a lined hole at the low point that gathers the water and gives the pump a reservoir to draw from, so it is not chasing a thin film across the floor.
    • The float switch: a floating trigger that rises with the water and kicks the pump on at a set level, then drops and shuts it off once the pit is drained, so it only runs when there is actually water to move.
    • The discharge line: the pipe that carries the water up and away to a legal discharge point, kept clear and running downhill so nothing flows back into the pit.

    Get those three right and the system quietly does its thing through a wet week without you thinking about it.

    Pump problem or drainage problem? Work out which first

    Before you spend a cent on a pump, be honest about why the water is turning up. A pump treats the symptom, but sometimes the water should never have pooled there at all. Have a look at the lie of the land after rain. If the ground slopes back toward the house, or a paved area sheds to one low spot, the real fix might be regrading, a spoon drain or a strip drain to carry water away before it ever collects. A pump earns its place where water genuinely has nowhere else to go, a below-grade garage or a natural low point, not as a patch over drainage that could be sorted properly. Money spent getting the fall right often saves you running a pump for the life of the house.

    When a blocked stormwater line is the real culprit

    Here is the one that catches people out. The pit keeps filling, the pump keeps straining, and everyone blames the pump, when the actual trouble is downstream. A stormwater line choked with tree roots, silt or a collapsed section cannot take the water away, so it backs up and floods the very spot you are trying to keep dry. If a pump that always coped suddenly cannot keep up, or water is surfacing at pits and gullies it never used to, suspect the line before you condemn the pump. Clearing or repairing that pipe often fixes the flooding outright. One important note: where stormwater is legally allowed to discharge, whether to the street, a legal point of discharge or the kerb, varies by council, so check your local requirements rather than just running a pipe to wherever is handy.

    Backup for the storm that really matters

    The cruel irony of a stormwater pump is that the storm big enough to need it is often the one that knocks the power out. A mains pump with no electricity is just a lump of plastic in a full pit. If flooding into the house is a genuine risk, it is worth a backup: a battery-backed pump that carries on when the power drops, or a second pump plumbed in so one can take over if the other fails. On a property that floods badly it is cheap insurance against the worst night of the year.

    Who installs and connects what

    This is where you draw a firm line. Dropping a portable pump into a pit and running a hose for a one-off is one thing. A permanent sump or stormwater system is another, and parts of it are not DIY.

    • The electrical side: connecting a pump to power, or putting a proper outdoor point where one is needed, is work for a licensed electrician on an RCD-protected circuit, not something to wire up yourself around water.
    • The pit and discharge: cutting a sump into a habitable or below-ground floor, and where the water is legally allowed to go, is not straightforward, and discharge points can be regulated by your council, so it pays to get it designed and signed off properly.

    Sort out why the water is really there, get the pump matched to the job and the drainage done right, and leave the wiring and the fixed discharge to the licensed trades. Do that and the next big storm becomes a non-event instead of a night bailing. For how this sits alongside the rest of your outdoor water setup, our guide to water in the Australian garden ties it all together.

  • Submersible vs Surface Pumps: Which One Does Your Job Need?

    Submersible vs Surface Pumps: Which One Does Your Job Need?

    The quickest way to choose between a submersible and a surface pump is to ask where the water is. A submersible pump sits down in the water — in a tank, pond, sump or bore — and pushes from below. A surface pump sits up on dry ground and draws water up to itself. Each suits different jobs, and the limiting factor for surface pumps is how far they can suck water upward. Here’s how to match the type to your task.

    The two broad pump families

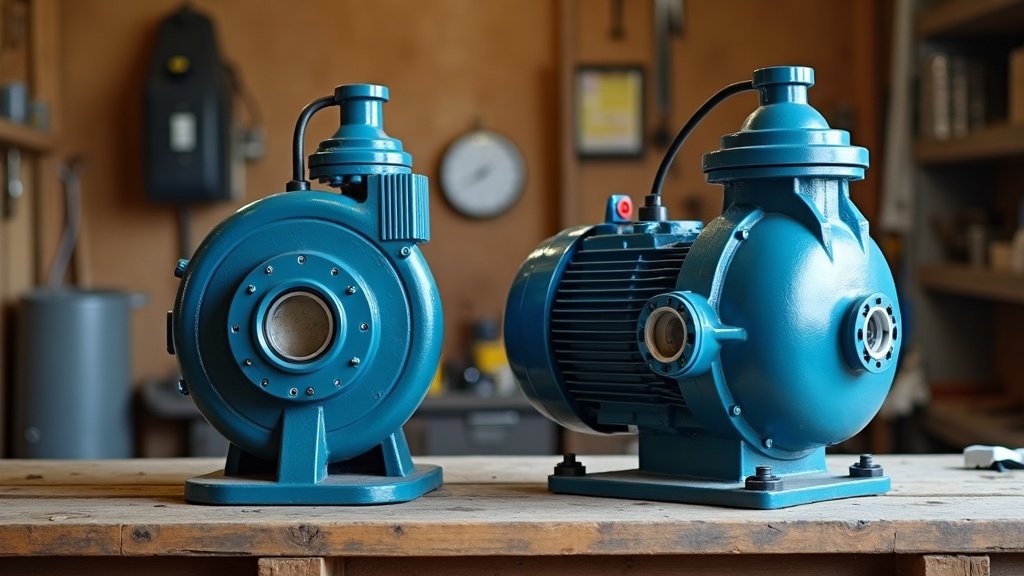
    Almost every water pump falls into one of two camps based on where it lives. Submersible pumps are built to be fully underwater and they push water up and out. Surface pumps stay dry, sit beside or above the water source, and pull water up before pushing it on. That single difference — pushing from in the water versus pulling from above it — drives most of the practical trade-offs in noise, access, priming and what each is good at.

    Submersible pumps: where they shine

    Because they sit in the water, submersibles are excellent wherever the water is contained or below ground: emptying or pressurising tanks, circulating ponds, clearing water from sumps and pits, and drawing from bores where the water is well below the surface. Being underwater makes them quiet — the water muffles the motor — and they’re self-cooled and never need priming, since they’re always surrounded by the water they move. The trade-off is access: to inspect or service one you have to lift it out of the tank or pit.

    Surface and self-priming pumps: where they shine

    Surface pumps stay on dry land, which makes them easy to reach, check and maintain. They suit drawing from shallow sources — a tank where the water sits near or above the pump, a shallow well, a stream — and transferring water from place to place. Self-priming versions can clear air from their suction line and get themselves going, which is handy where the pump sits above the water. The catch is that they have to lift water up to themselves before they can push it on, and there’s a limit to how far up they can pull.

    Suction lift and priming — the limit people forget

    This is the single thing that catches people out. A surface pump can only pull water up so far before it simply can’t lift any more — that vertical distance is its suction lift, and physics caps it. The exact workable distance depends on the pump, the pipework and your conditions, so don’t treat any single figure as a universal rule. If your water source sits well below where the pump would go, a surface pump may struggle or refuse to prime, and a submersible — which pushes rather than pulls — is usually the better answer. When in doubt, check the suction lift against your actual setup before buying.

    Noise, access and maintenance differences

    Submersibles are quiet because the water absorbs the sound, but they’re out of sight and a little more effort to pull up for a look. Surface pumps are easy to inspect and service since they’re right there in the open, but they’re more audible — worth considering if the pump sits near a patio or bedroom window. Think about how often you’ll need to get at the pump, and how much noise you can live with, alongside the technical fit.

    Matching the type to the job

    Put it together by source: tanks can go either way depending on where the water sits; ponds and sumps lean submersible; bores with deep water almost always want a submersible; shallow draws and general water transfer suit a surface or self-priming pump. Get the family right first, then size the pump to the work.

    Two rules apply to both types. The electrical connection must be done by a licensed electrician on an outdoor, RCD-protected circuit — especially important with submersibles sitting in water. And any connection to mains or potable water, including backflow prevention, is licensed plumber’s work. Position and plumb the garden side yourself; bring in the trades for those connections.

    Choosing a pump type is one piece of the wider water picture — see how it fits with tanks, ponds and efficient watering in our guide to water in the Australian garden.

  • Pressure and Booster Pumps for the Home: Fixing Weak Water Pressure

    Pressure and Booster Pumps for the Home: Fixing Weak Water Pressure

    If your shower dribbles, the washing machine takes forever to fill, or two taps running at once kills the flow, a pressure or booster pump may be the answer — but not always. Sometimes low pressure has a simpler cause worth ruling out first. When a pump genuinely is the fix, the plumbing connection is a licensed plumber’s job and the electrical connection is a licensed electrician’s job. Here’s how to tell what you need.

    Why pressure might be low (and when a pump is the answer)

    Low water pressure has a few common culprits. You might be at the end of a long supply line, up a hill, or simply in an area with naturally low mains pressure. Sometimes it’s a partly closed valve, a blocked filter or aerator, or old galvanised pipes narrowed by corrosion — all worth checking before you spend on a pump, because they’re cheaper to fix.

    If the supply pressure itself is genuinely low — or you’re drawing from a rainwater tank that can’t provide household pressure on its own — that’s when a pressure or booster pump earns its place. It lifts the pressure to a comfortable, usable level throughout the house or garden.

    How a pressure or booster pump works (in plain terms)

    A booster pump does what the name says: it takes water coming in at a low pressure and boosts it to something more useful. Water enters the pump, an impeller driven by an electric motor adds energy, and the water leaves at higher pressure. Many systems pair the pump with a small pressure tank that smooths out delivery and stops the pump from constantly switching on and off for every little draw.

    Constant-pressure vs on/off systems

    There are two broad styles. A traditional on/off (pressure-switch) system runs the pump until pressure reaches a set point, then stops, and restarts when pressure drops — simple and reliable, though you may notice slight pressure swings. A constant-pressure system varies the pump’s speed to hold steady pressure no matter how many outlets are open, which feels smoother, especially when several taps run at once. Constant-pressure setups generally cost more; the simpler system is often plenty for a single household.

    Where the pump fits in the plumbing — and who connects it

    A booster pump is installed in line with your water supply — after the meter or tank, before the outlets you want boosted. Getting that connection right matters: it needs correct fittings, isolation valves so it can be serviced, and protection against running dry. Tying a pump into your household water supply is licensed plumbing work, and depending on the setup may involve backflow prevention to protect the town supply. This is a job for a licensed plumber, not a DIY plumbing project.

    Electrical supply: why this is a licensed electrician’s job

    A booster pump runs on mains electricity and usually lives outdoors or in a wet area like a laundry or pump shed. Wiring it in must be done by a licensed electrician, on an RCD-protected circuit suited to the pump. Water and unlicensed electrical work are a dangerous combination, and outdoor power simply isn’t a DIY connection in Australia. Plan for the electrician as part of the install, not an afterthought.

    What to look for when buying

    Without naming products, a few qualitative things help you choose well. Match the pump’s capability to your actual need — a small flat with one bathroom has very different demands to a large house running multiple showers at once. Look for dry-run protection so the pump shuts down rather than burns out if it loses water. Consider noise if it’s near living areas, and think about access for servicing. And get advice on sizing: an oversized pump wastes money and can short-cycle, while an undersized one won’t solve the problem. A supplier or installer who asks about your house and supply, rather than just selling the biggest unit, is the one to trust.

    Pressure pumps are one part of the household water picture — see how they relate to tanks, ponds and efficient watering in our guide to water in the Australian garden.

  • Water in the Australian Garden: Pumps, Ponds, Water Features and Water-Wise Landscaping

    Water in the Australian Garden: Pumps, Ponds, Water Features and Water-Wise Landscaping

    Water shapes how an Australian garden looks, sounds and survives. Whether you’re moving water with a pump, building a pond, running a fountain or simply trying to keep a garden alive through a dry summer, the same four threads keep turning up: how you move and store water, how you keep it healthy, how you make it a feature, and how you use less of it. This guide ties those four together and points you to the safety rules that apply across all of them.

    The four pillars of water in the garden

    Most water questions in a backyard fall into one of four areas. The first is household and garden pumps — the gear that moves water from a tank, a well point or a low-pressure mains supply to where you actually need it. The second is ponds and fish, which bring movement and life but need a bit of planning to stay clear and healthy. The third is water features and fountains, the decorative side that turns a corner of the yard into something you want to sit beside. The fourth is water-wise and drought-tolerant landscaping — designing a garden that drinks less in the first place.

    How they connect

    These pillars aren’t separate hobbies. A rainwater tank feeds a pump, the pump runs an irrigation line or tops up a pond, the pond becomes a water feature, and a water-wise planting scheme means the whole system has less work to do. Get one part right and the others get easier. Oversize your storage and undersize your pump and you’ll be frustrated; plant thirsty exotics in full western sun and no amount of clever plumbing will keep them happy.

    Thinking about the garden as one connected water system — storage, movement, use and feature — tends to produce better results than buying bits and pieces in isolation.

    The safety theme that runs through everything

    Across all four pillars, three safety rules come up again and again in Australia, and they matter because they’re about both your safety and staying on the right side of the law.

    Electrical connection is a licensed electrician’s job. Any pump, pond pump, UV clarifier, aerator or fountain that runs on mains power needs to be wired in by a licensed electrician, on an outdoor circuit that’s RCD-protected. Water and electricity are an obvious hazard, and DIY wiring of outdoor power isn’t legal for an unlicensed person. You can usually position and plumb the gear yourself, but the electrical connection is not a DIY step.

    Connecting to mains or potable water is a licensed plumber’s job. If you’re tying a rainwater tank into the household supply, installing a mains-switching device, or doing anything that touches drinking-water plumbing, that’s licensed plumbing work and may require backflow prevention to protect the town supply. Garden-only setups give you far more freedom; the moment the house water is involved, bring in a plumber.

    Bore water, rainwater rules and water restrictions vary by state and council. What you’re allowed to do with a bore, how rainwater can be used, and which days or hours you can water all depend on where you live. These rules change, so rather than trust a blanket statement, check your local water authority or council for the current position before you commit to a plan.

    Where to start

    If you’re new to all of this, start with what you actually need water to do. A garden that’s struggling in summer points you toward storage and efficient irrigation. A dull, quiet corner points toward a pond or water feature. Weak flow from a tank points toward the right pump. Once you know the job, the type of equipment and the trades you’ll need to involve become much clearer.

    From here you can dig into each pillar in detail — tanks and rainwater, building a pond, boosting water pressure, irrigating efficiently, and choosing between pump types — and come back to this overview whenever you want to see how the pieces fit together.