Building a garden pond is well within reach for a weekend-handy homeowner: choose a level, partly shaded spot, decide how big and deep you want it, dig and shape the hole, line it, add water movement, then plant it and let it settle. The two parts to leave to professionals are the pump’s electrical connection (a licensed electrician) and checking whether your council has depth or fencing rules. Here’s how it comes together.
Choosing the spot
The right position makes everything easier. Look for somewhere that gets a few hours of sun but isn’t baking all day — too much sun feeds algae, too little starves your plants. Avoid the lowest point of the yard where stormwater runoff and garden chemicals will wash in. A reasonably level area saves you a lot of grief when it comes to getting the water line even.
Safety matters too. If young children use the garden, think carefully about open water. Some councils treat ponds over a certain depth like pools and may have fencing or barrier requirements, so check your local council’s rules before you dig.
How big and how deep
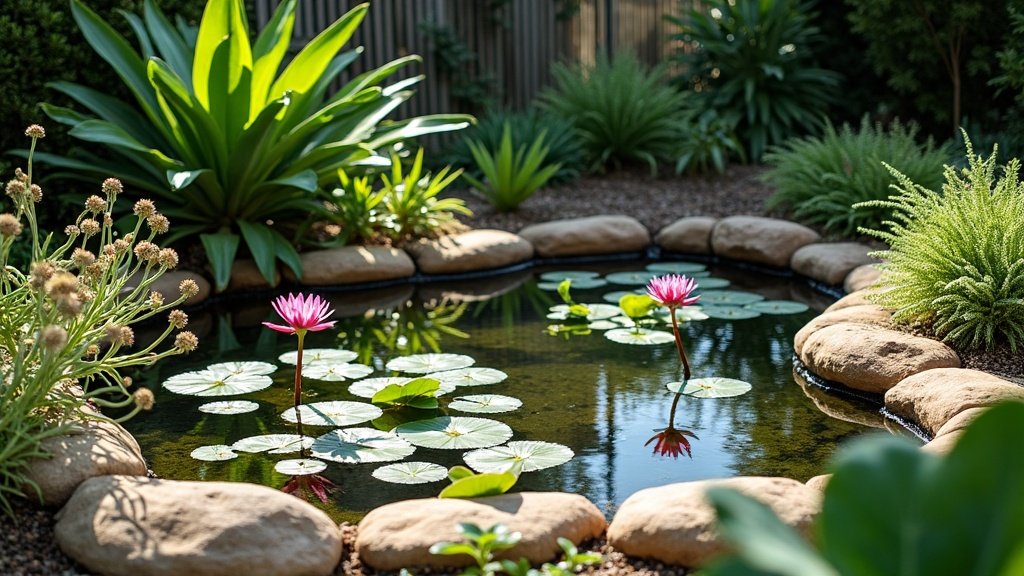
Bigger ponds are actually more forgiving — a larger volume of water stays more stable in temperature and chemistry than a tiny one. For depth, you generally want a deeper zone so the water doesn’t overheat in summer and so fish, if you keep them, have somewhere cooler to retreat. Shallower margins around the edge give plants a home and let wildlife get in and out. There’s no need to chase exact figures; scale it to your yard and how much maintenance you’re happy to do.
Flexible liner vs preformed shells
You’ve got two main ways to hold the water. A flexible liner lets you make any shape and size you like and tends to suit larger, natural-looking ponds; it’s draped into the hole and shaped as you go. A preformed shell is a rigid moulded pond you drop into a matching hole — quicker and simpler for a small pond, but you’re locked into its shape and size. For a first pond, a preformed shell is the easy option; for something organic and bigger, a liner gives you freedom.
Digging, shelving and edging
Mark the outline, then dig in stages, cutting a shallow shelf around the perimeter for marginal plants and a deeper central zone. Remove sharp stones and roots, and add a layer of sand or underlay to protect a liner. Set your liner or shell, check the rim is level all the way round, then fill slowly so it settles into shape. Finish the edge with rocks, pavers or plants to hide the liner, hold it down and create a natural transition into the garden.
Water movement: why most ponds need a pump
Still water tends to go stagnant, grow algae and lose oxygen. A pump keeps water circulating — running a small fountain, a spillway or a filter — which keeps it clearer, better oxygenated and healthier for fish and plants. Choose a pump suited to your pond’s size and what you want it to do, whether that’s a gentle ripple or a proper waterfall.
Position and plumb the pump yourself if you like, but the electrical connection must be done by a licensed electrician, on an outdoor RCD-protected circuit. Mains power beside a body of water is exactly the situation those rules exist for — it’s not a DIY step.
Planting and letting it settle
A new pond needs time. Add a mix of plants — submerged oxygenators, marginal plants on the shelves, and a floating-leaf plant or two for shade — and then be patient. The water may go cloudy or green at first while it finds its balance; that’s normal. Hold off adding fish until the pond has settled for a few weeks and the plants are established. Top up with rainwater where you can, and resist the urge to fiddle. Within a season most ponds find their rhythm.
A pond is one piece of the bigger water picture — see how it sits alongside pumps, features and water-wise design in our guide to water in the Australian garden.